- Briefly explained: What is Shopware 6 and since when does it exist
- Shopware 6 vs Shopware 5 – especially for newsletters
- Comparison of Shopware 5 and Shopware 6
- Requirements: newsletter signup and double opt in in Shopware 6
- Step by step: export newsletter recipients in Shopware 6
- 1. Open the import export module
- 2. Create a new export profile for newsletter recipients
- 3. Define fields for the export (mapping)
- 4. Run the CSV export of newsletter recipients
- What to do with the exported newsletter list
- CSV import into an email marketing tool
- Use the CSV file in Thunderbird or Outlook
- Extensions: send newsletters directly from Shopware 6
- Legal notes and best practices
Shopware 6 has changed a lot in the newsletter area. While you could create and send newsletters directly from the backend in Shopware 5, Shopware 6 only collects the newsletter recipients and leaves the actual sending to specialized tools like Mailchimp, Brevo, CleverReach or your email client.
To work with these tools, you need a clean list of your newsletter subscribers. This article shows you how to handle a Shopware 6 newsletter export step by step, which fields are useful for your CSV and how you can use the list in your email marketing tools. You will also get a short overview of what Shopware 6 is, since when it exists and how Shopware 6 vs Shopware 5 compares, especially when it comes to newsletters.
Briefly explained: What is Shopware 6 and since when does it exist
Shopware 6 is the current e commerce platform from Shopware and the successor to Shopware 5. The software was not just updated but rebuilt from scratch. Some important concepts are:
- API first approach
- Headless commerce
- Clear separation between administration, storefront and API
- Focus on flexible sales channels instead of fixed subshops
The first public versions of Shopware 6 were released in 2019. Since then, Shopware 6 has been continuously developed with new features, bug fixes and security updates. Shopware 5 is only maintained for a limited time, while the long term focus is clearly on Shopware 6.
Shopware 6 vs Shopware 5 – especially for newsletters
Especially in the newsletter area there are noticeable differences. Many merchants who migrate from Shopware 5 first look for the old newsletter module and cannot find it.
Comparison of Shopware 5 and Shopware 6
| Topic | Shopware 5 | Shopware 6 |
|---|---|---|
| Newsletter sending | Built in newsletter module in the core | No sending in the core, focus on external email marketing tools |
| Newsletter recipients | Managed inside the newsletter module | Managed under Marketing and in the sales channels |
| Architecture | Classic, more monolithic structure | Modern modular architecture, API first and headless ready |
| Future proofing | No new feature releases | Active development with new releases and improvements |
In short: the shop collects the subscriptions with double opt in, while sending, tracking and statistics are handled by a dedicated email tool. To make everything work together, you have to export newsletter recipients in Shopware 6 on a regular basis and import them into your newsletter system.
Requirements: newsletter signup and double opt in in Shopware 6
Before you start with the Shopware 6 newsletter export, the basic newsletter setup should be in place.
- Customers can sign up when creating an account, during checkout or through a newsletter form in the footer or on a landing page.
- In the newsletter configuration you can activate double opt in. In that case, subscribers receive a confirmation email with a link and are only stored as active newsletter recipients after clicking it.
- The actual entries can be found in the Marketing area under newsletter recipients. There you can filter by status, language and sales channel.
Typical status values are for example:
| Status value | Meaning |
|---|---|
optIn | Subscriber agreed to receive the newsletter |
optOut | Subscriber unsubscribed |
unconfirmed | Signup started but not yet confirmed |
pending | Waiting for confirmation or deletion, depending on configuration |
For exporting and later sending, you usually only want recipients with status optIn.
Step by step: export newsletter recipients in Shopware 6
The export runs through the Shopware 6 import export module in the administration. You create a profile for the object type “newsletter recipients” once and can then reuse it for every future export.
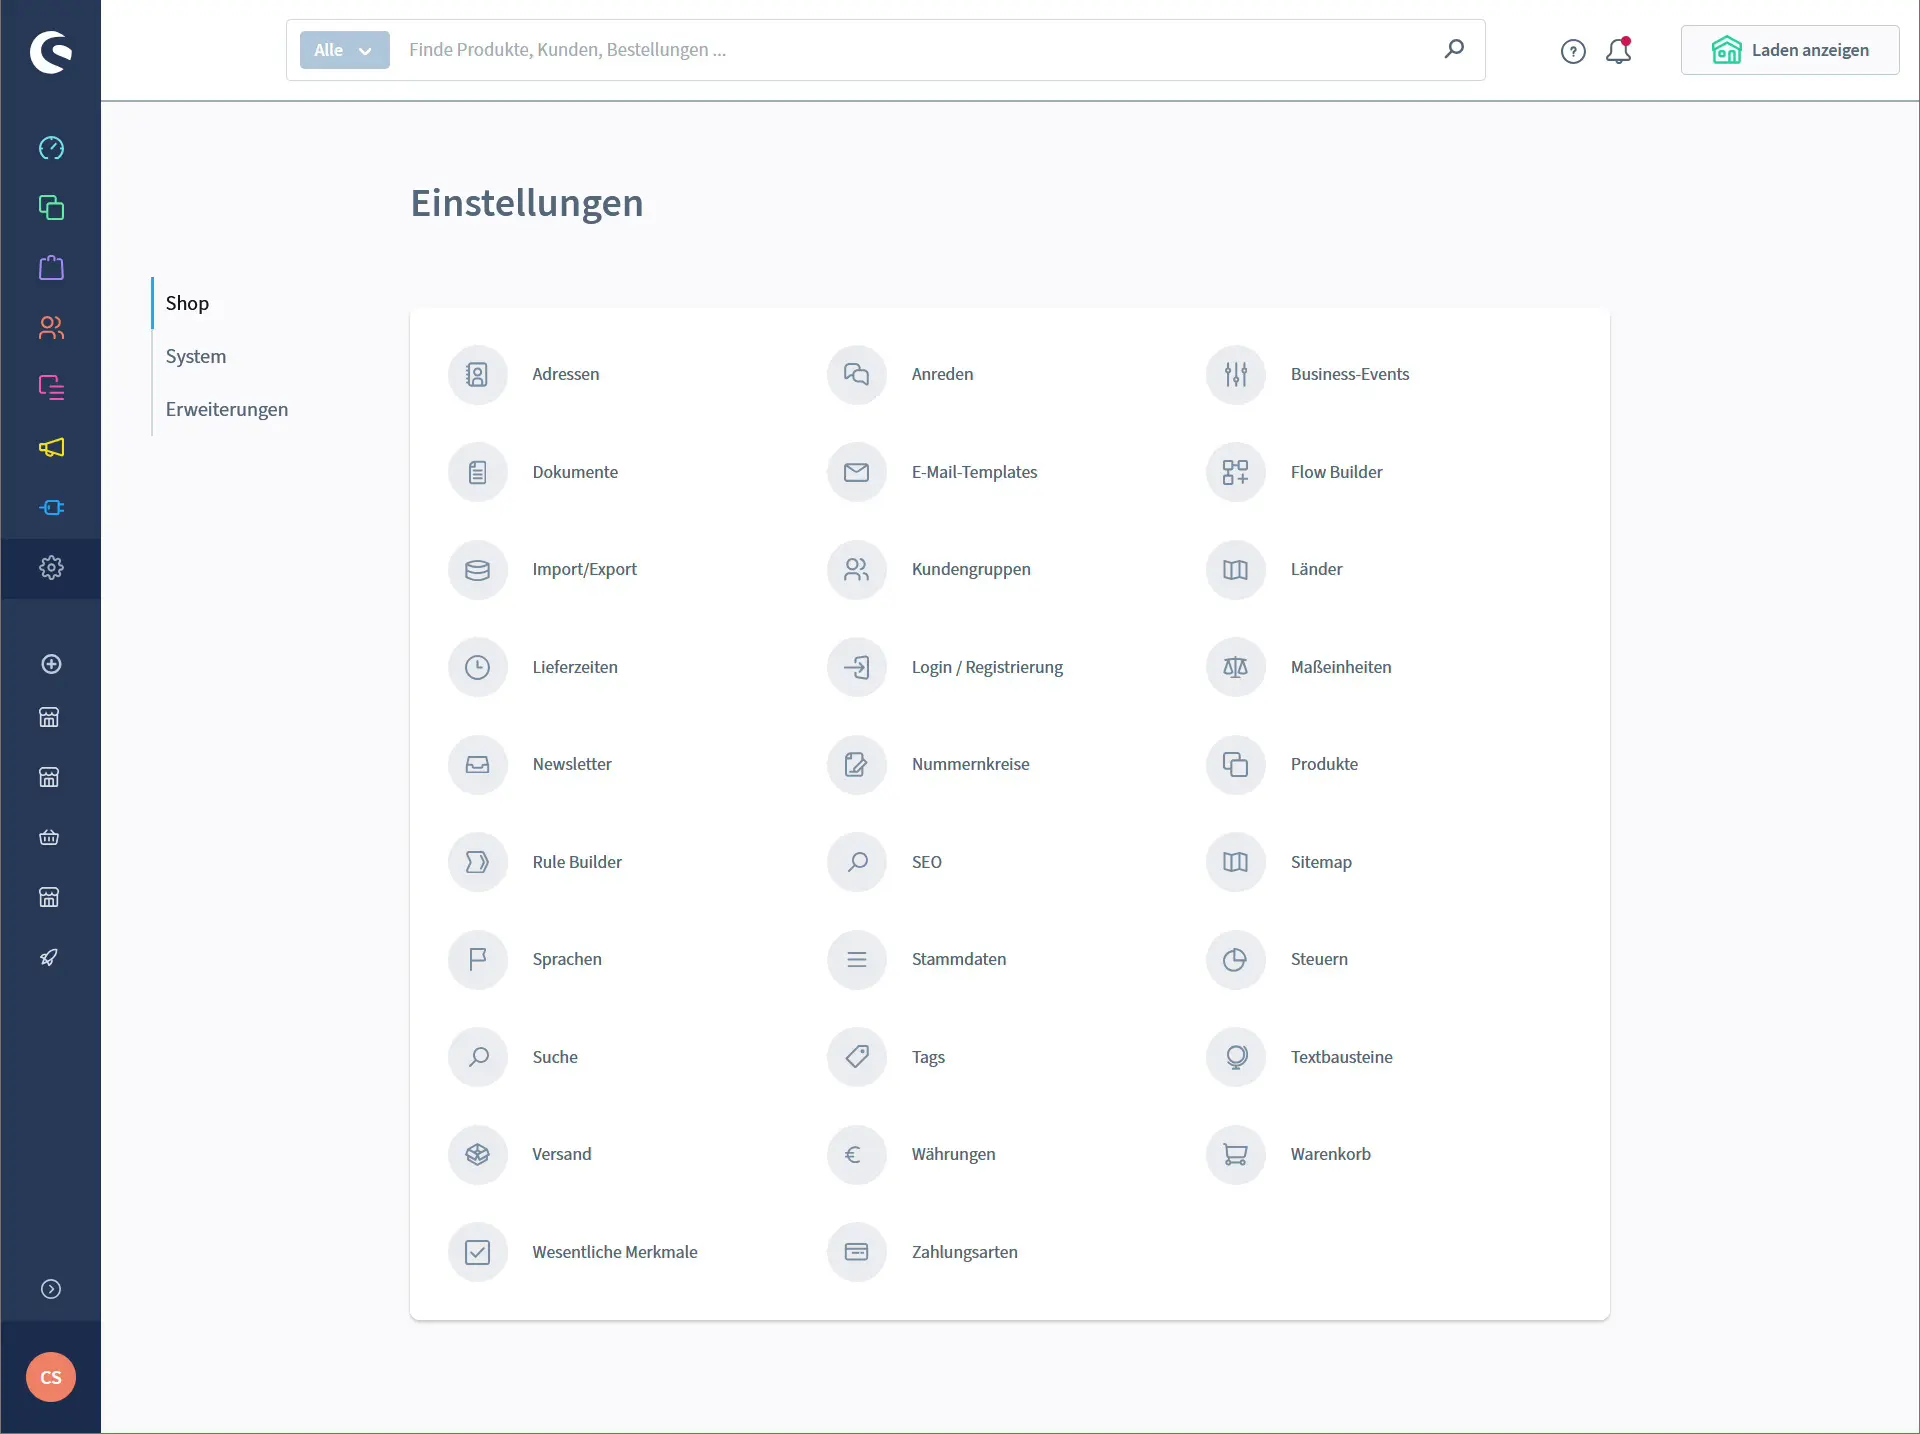
1. Open the import export module
- Log in to your Shopware 6 administration.
- Click the settings icon (gear symbol) in the lower left corner.
- Under the “Shop” section, choose Import/Export.
At the top you will see three tabs: “Import”, “Export” and “Profiles”.
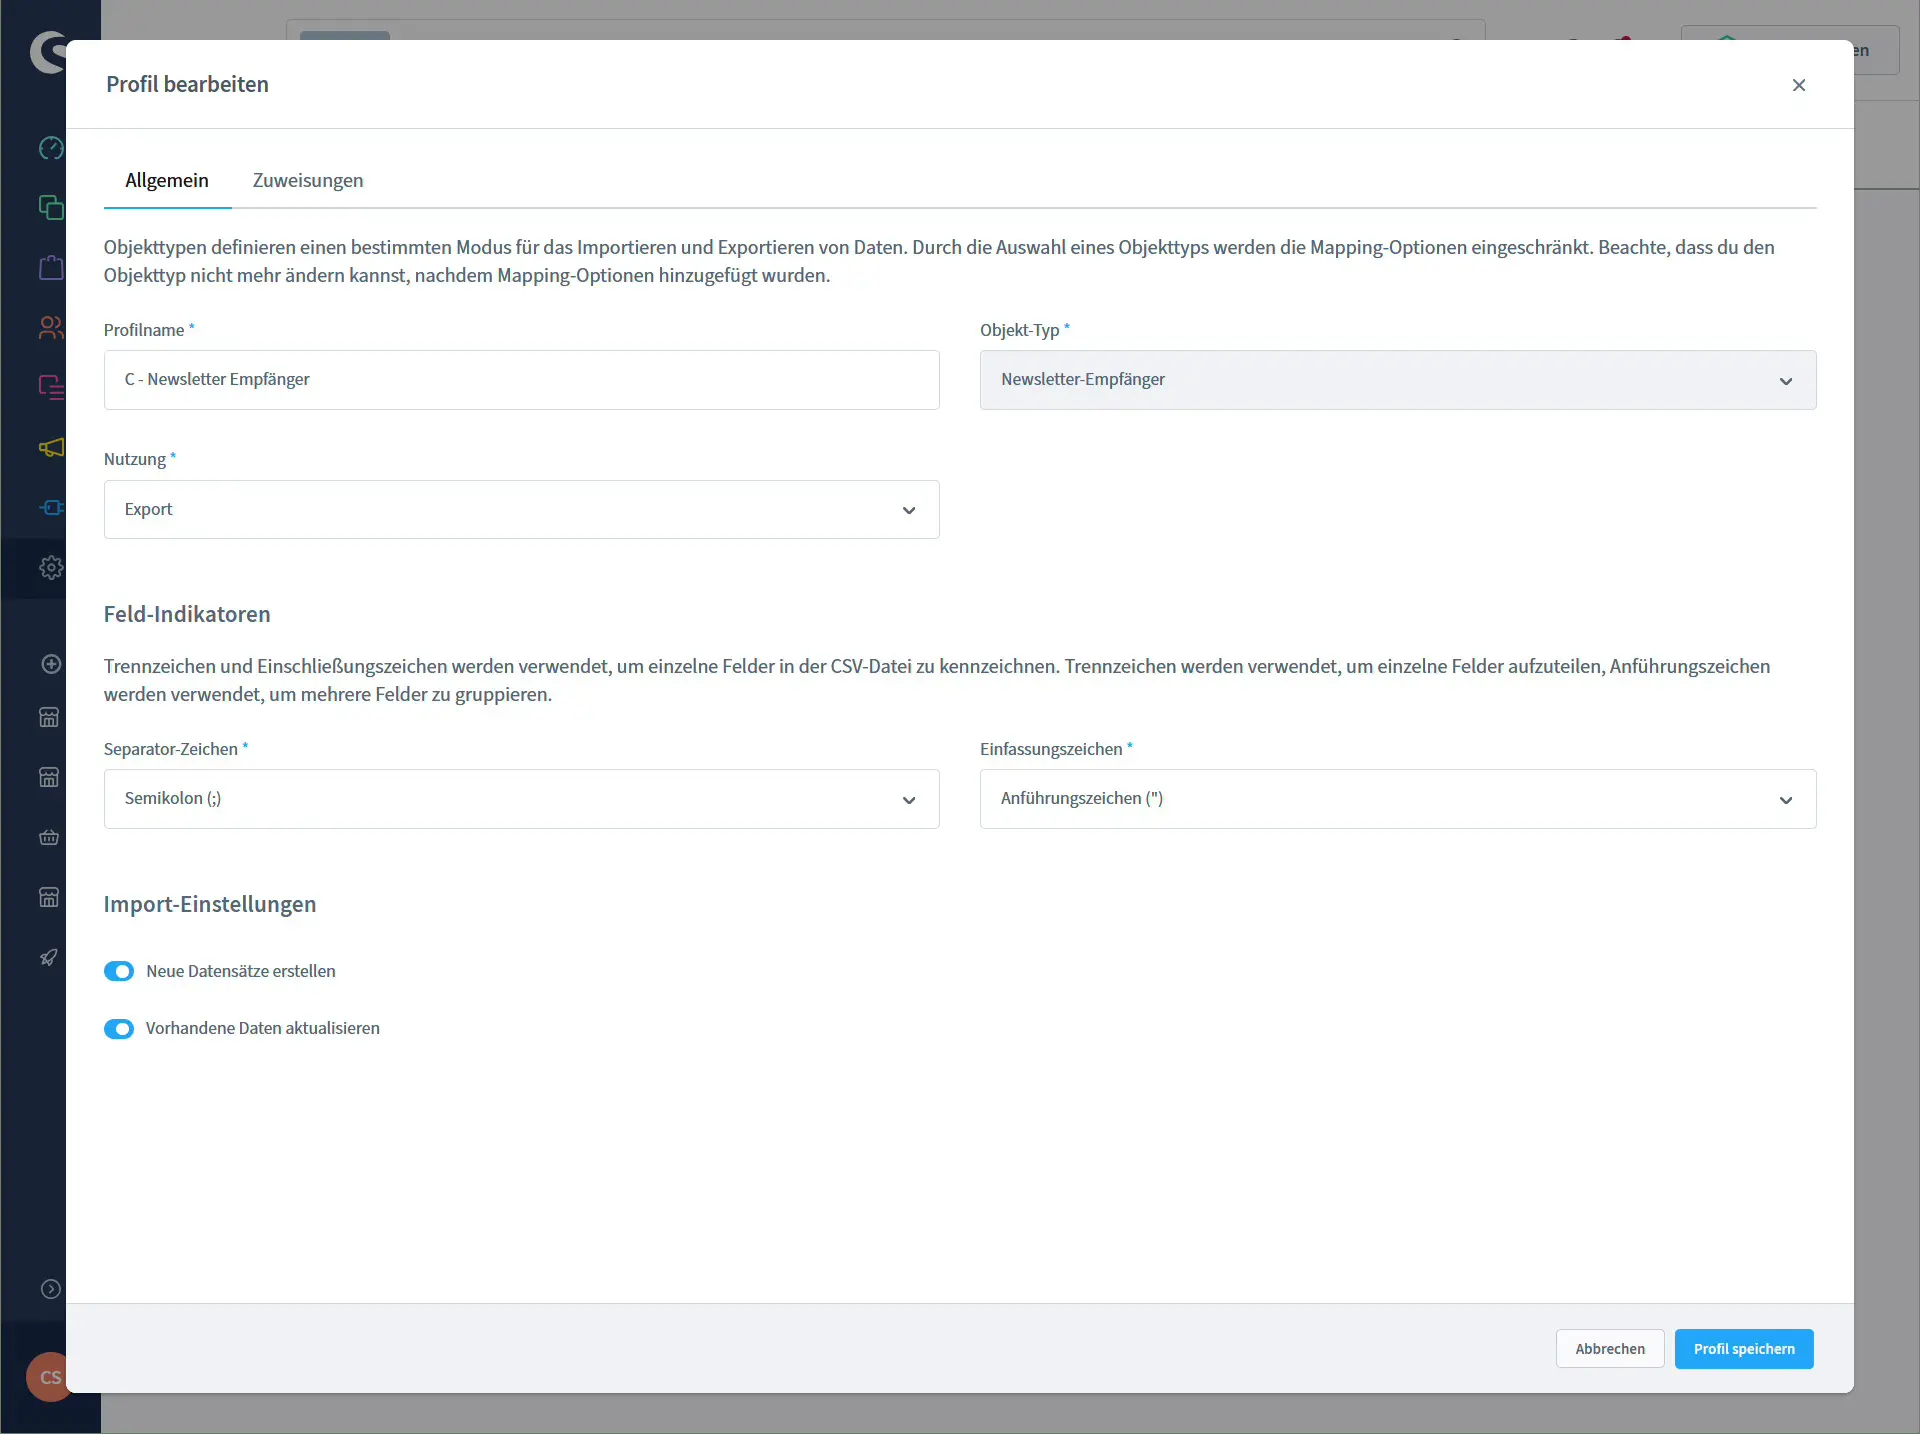
2. Create a new export profile for newsletter recipients
Now you create a profile that tells Shopware which data should go into the CSV file.
- Switch to the Profiles tab.
- Click Add profile.
- In the General tab fill in for example:
- Object type:
Newsletter recipients - Usage:
Export - Separator:
Semicolon (;) - Enclosure:
"(quotation mark)
- Object type:
- Save the profile.
These settings give you a CSV file that works well with Excel, LibreOffice and most newsletter tools.
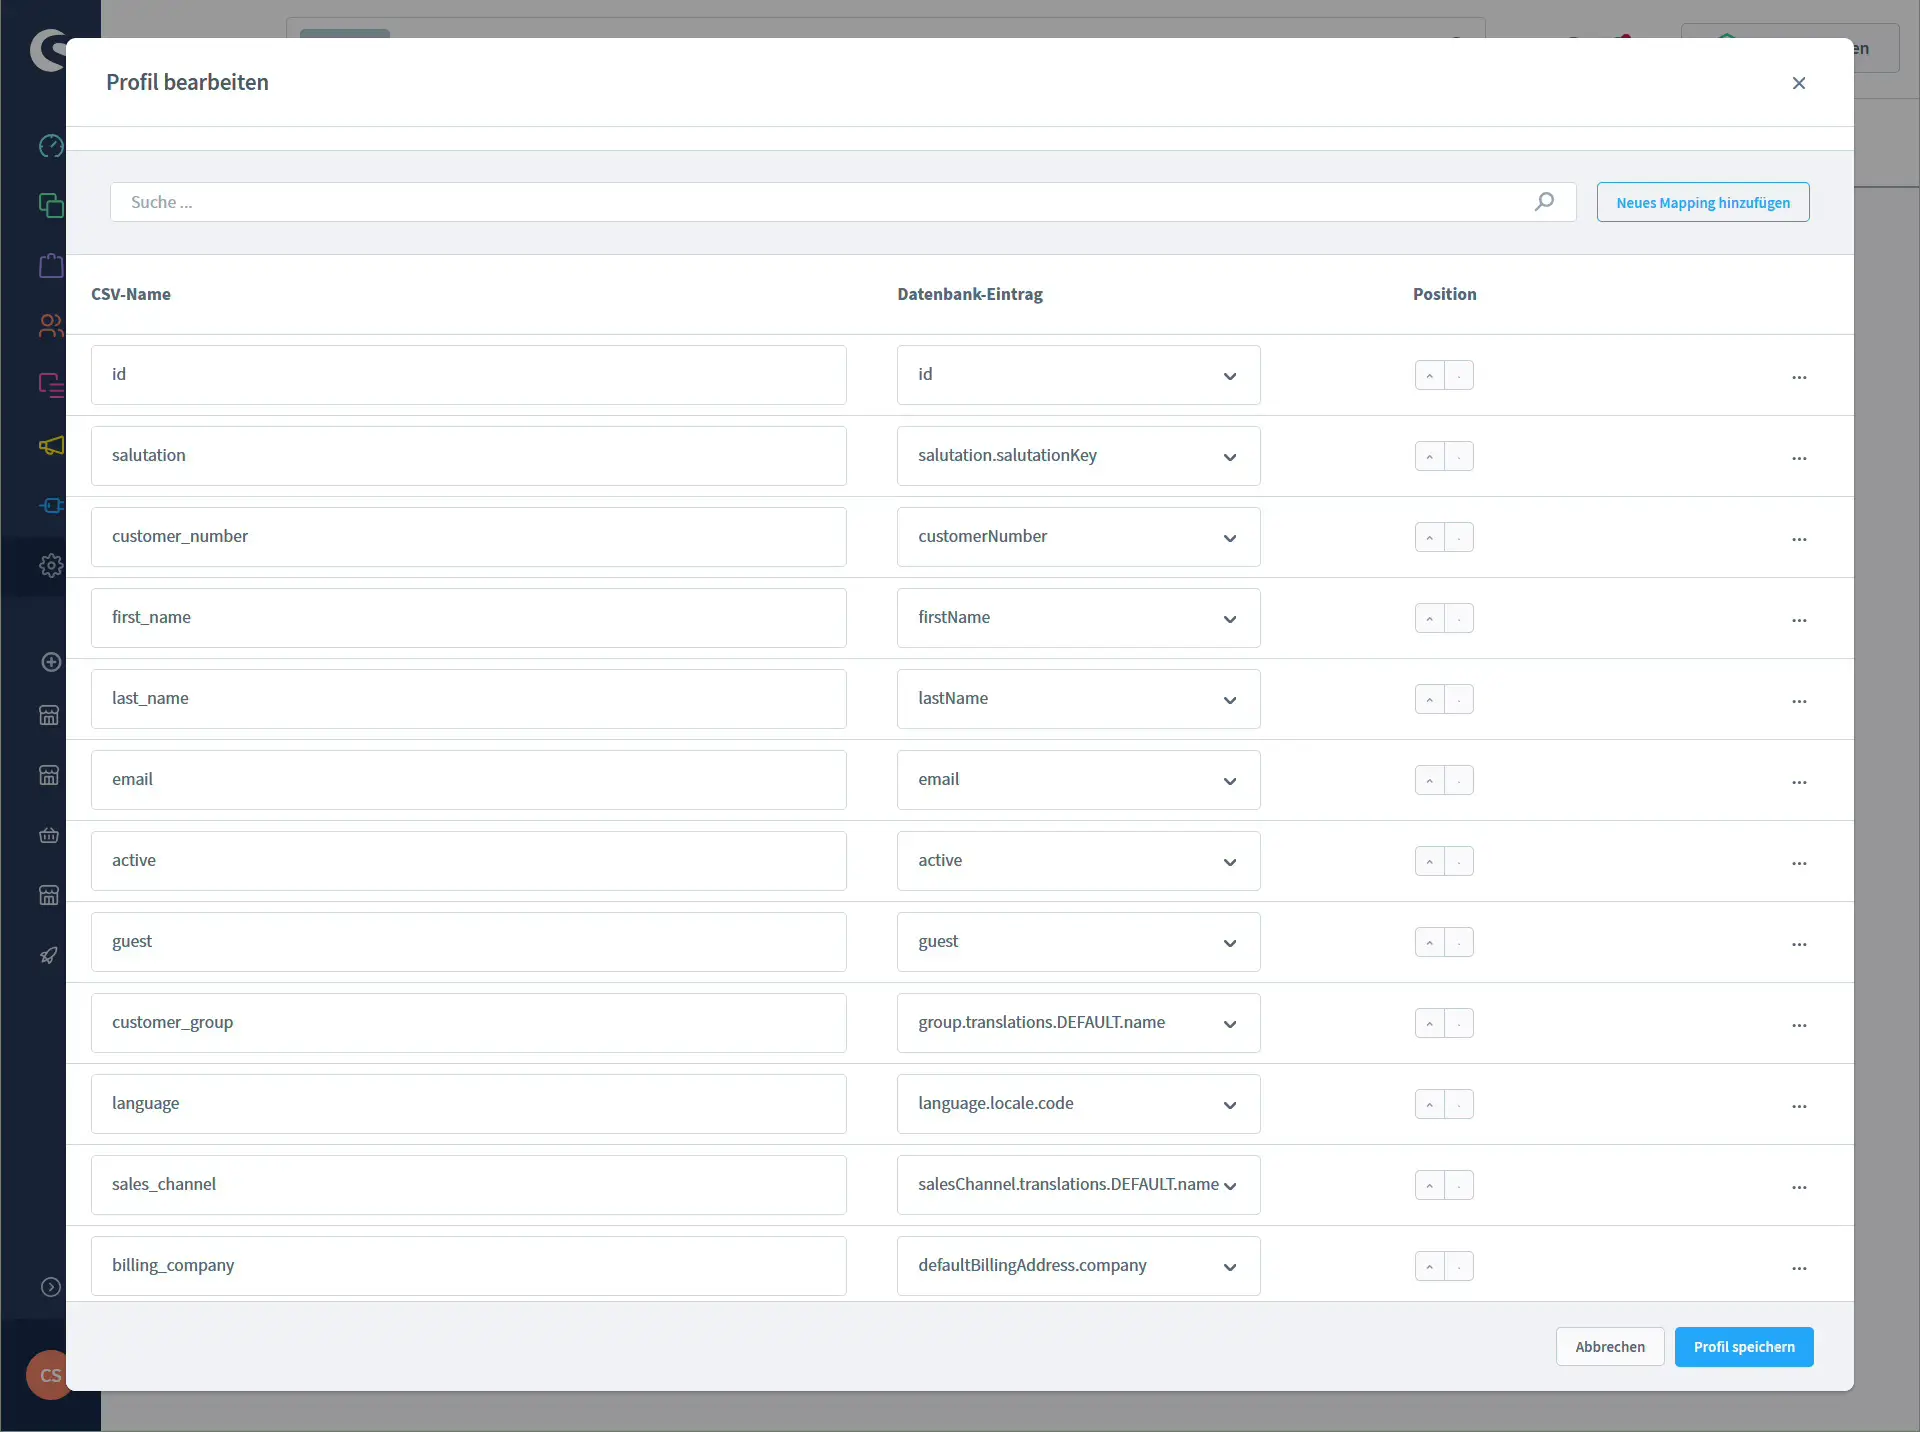
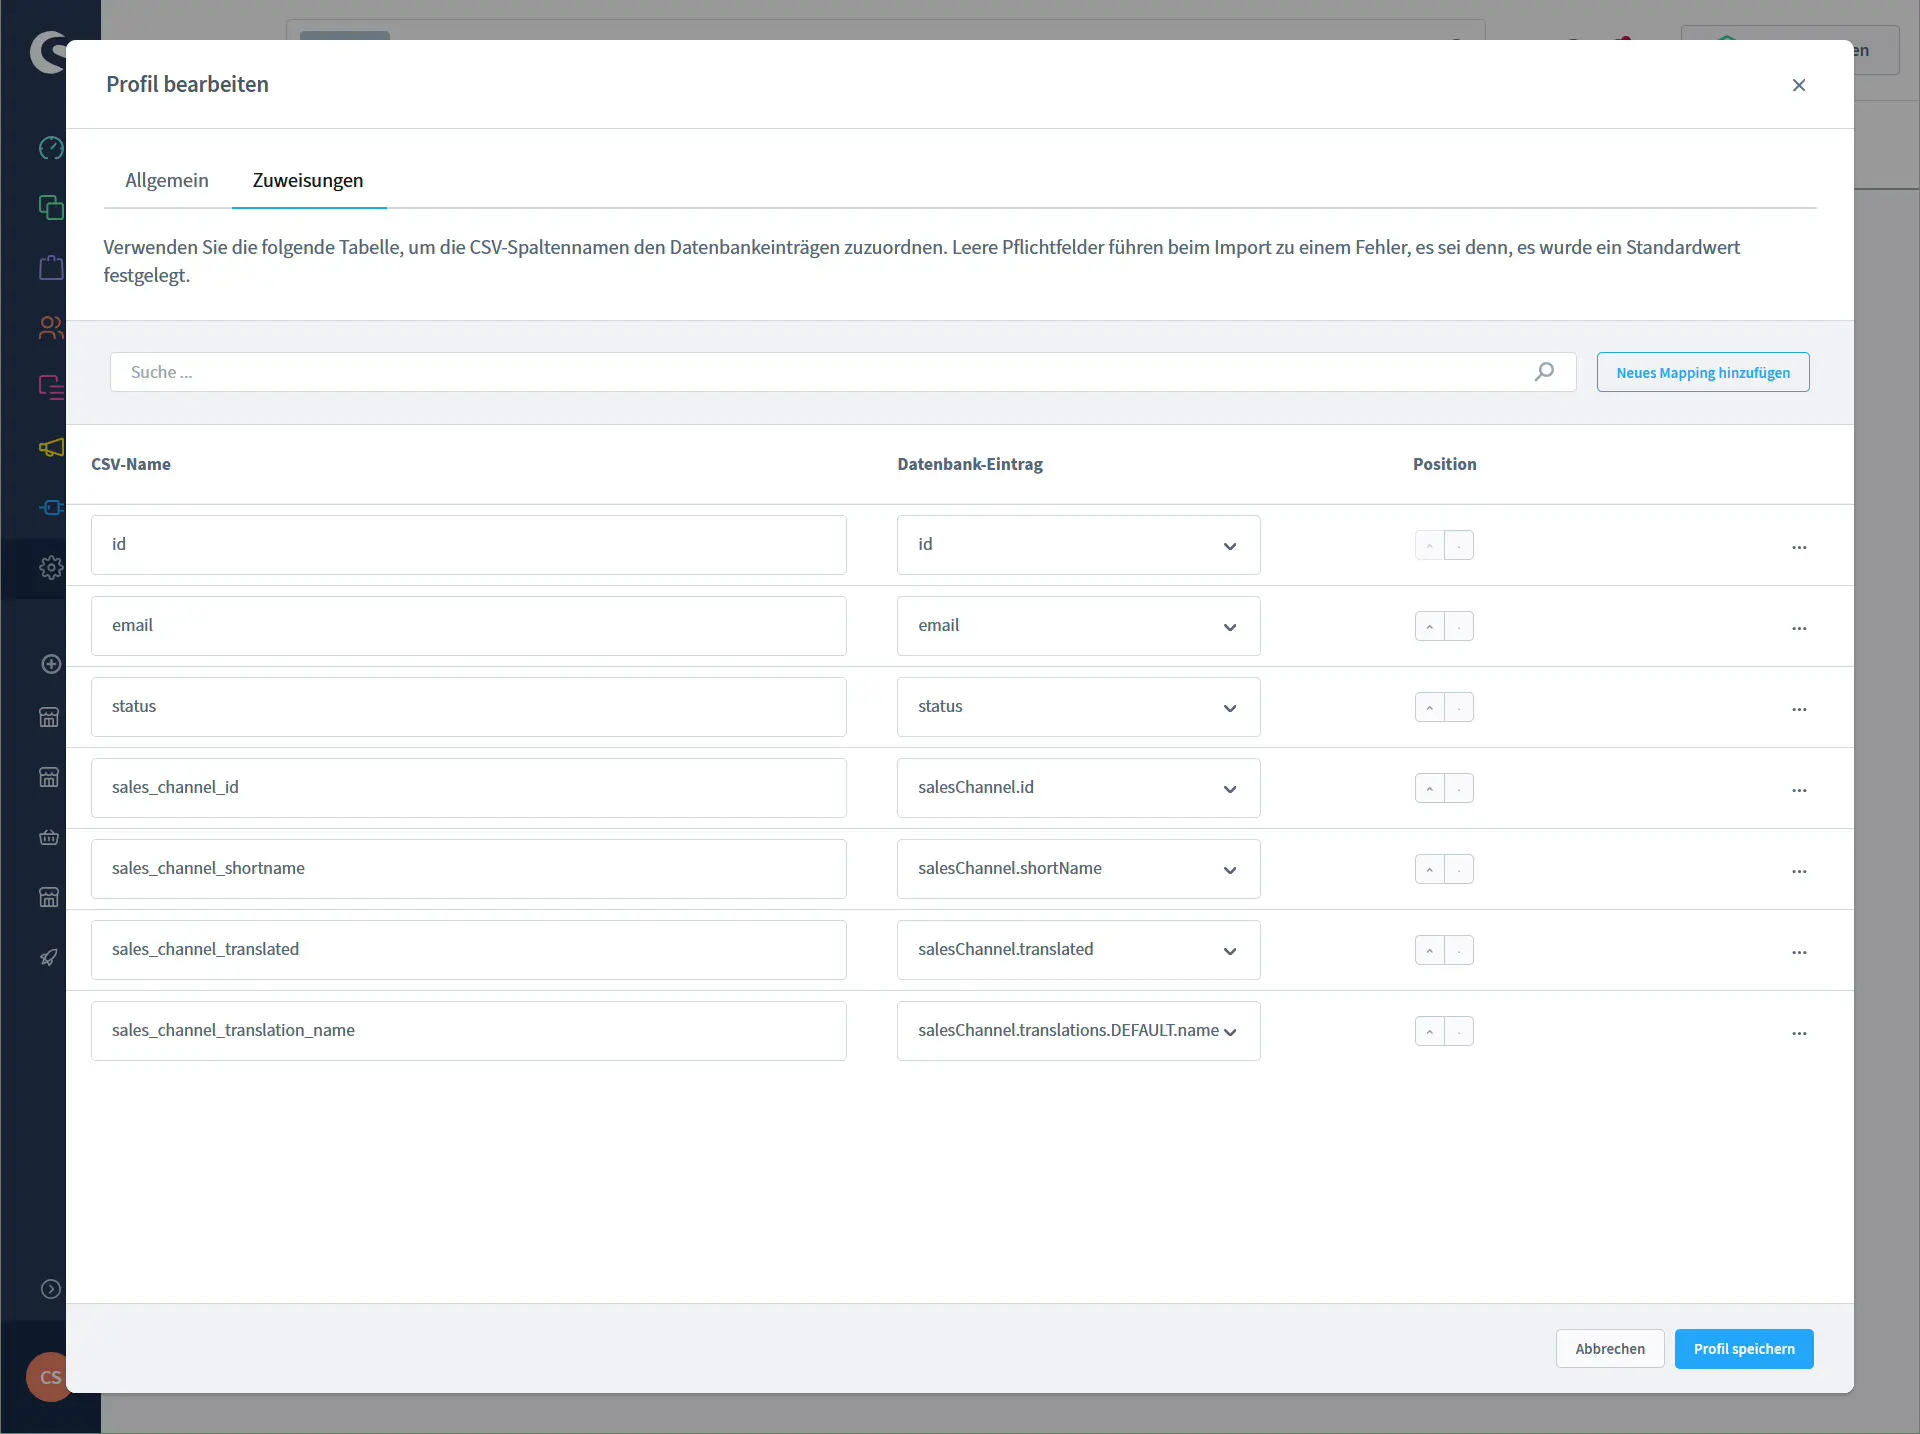
3. Define fields for the export (mapping)
In the second tab Mapping you define which columns your CSV file will contain and which database fields they are mapped to.
A useful mapping for a Shopware 6 newsletter export might look like this:
| CSV name | Database entry | Description |
|---|---|---|
id | id | Internal ID of the newsletter recipient |
email | email | Email address of the subscriber |
status | status | Status, for example optIn or optOut |
sales_channel_id | salesChannel.id | ID of the sales channel |
sales_channel_shortname | salesChannel.shortName | Short name of the sales channel |
sales_channel_translated | salesChannel.translated | Translated data of the sales channel |
sales_channel_translation_name | salesChannel.translations.DEFAULT.name | Human readable name of the sales channel |
Optionally, you can add more fields, for example first name, last name, language or creation date. The more fields you export, the better you can segment your contacts later, for example only German subscribers from a specific sales channel.
When you are happy with the mapping, click “Save profile”.
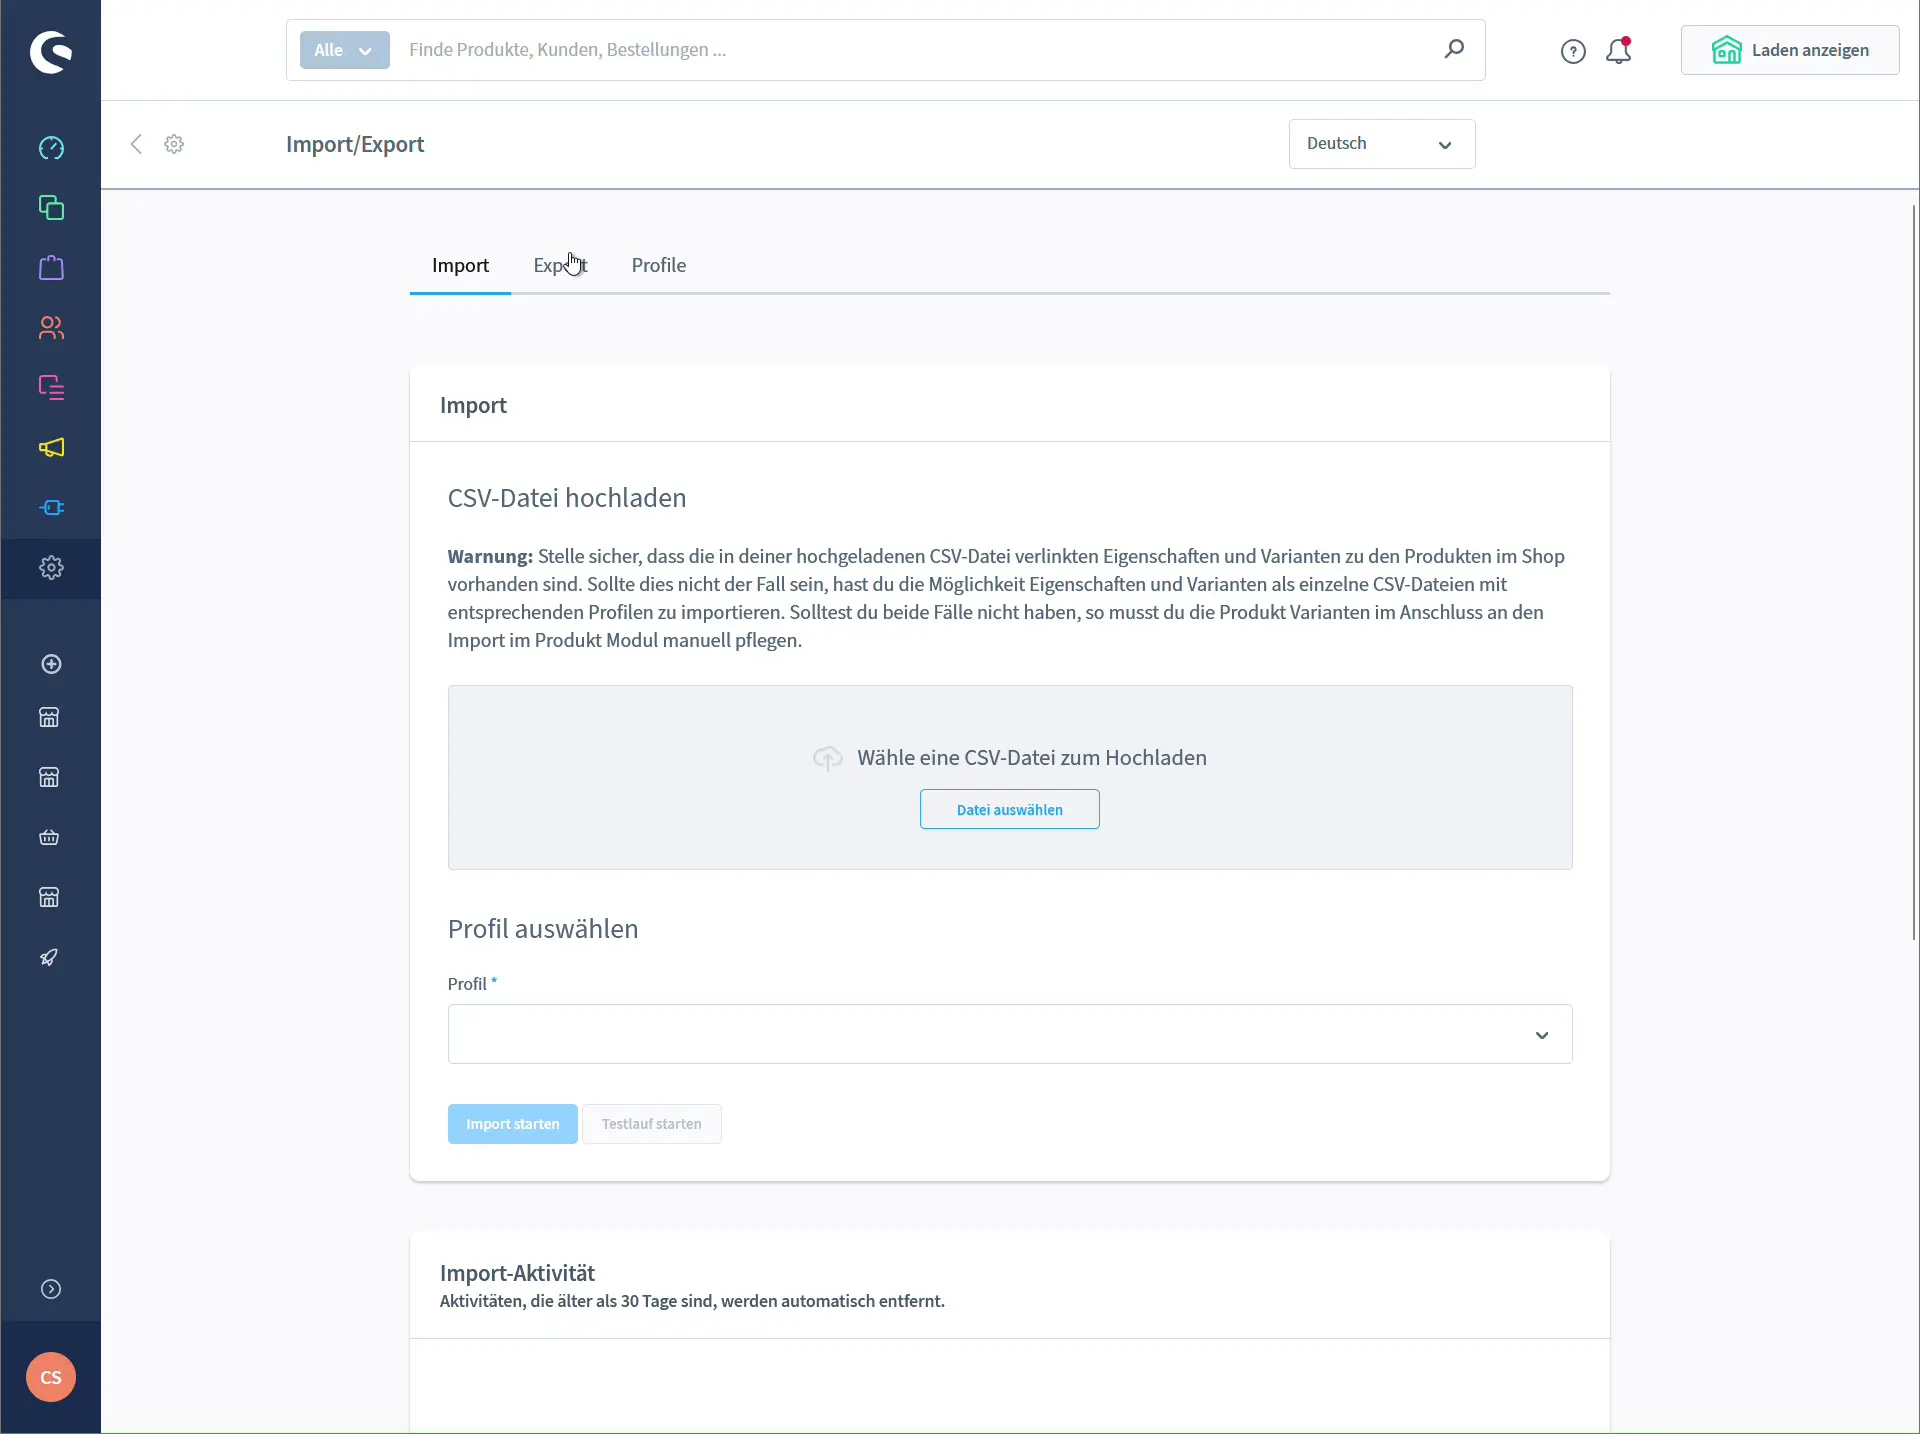
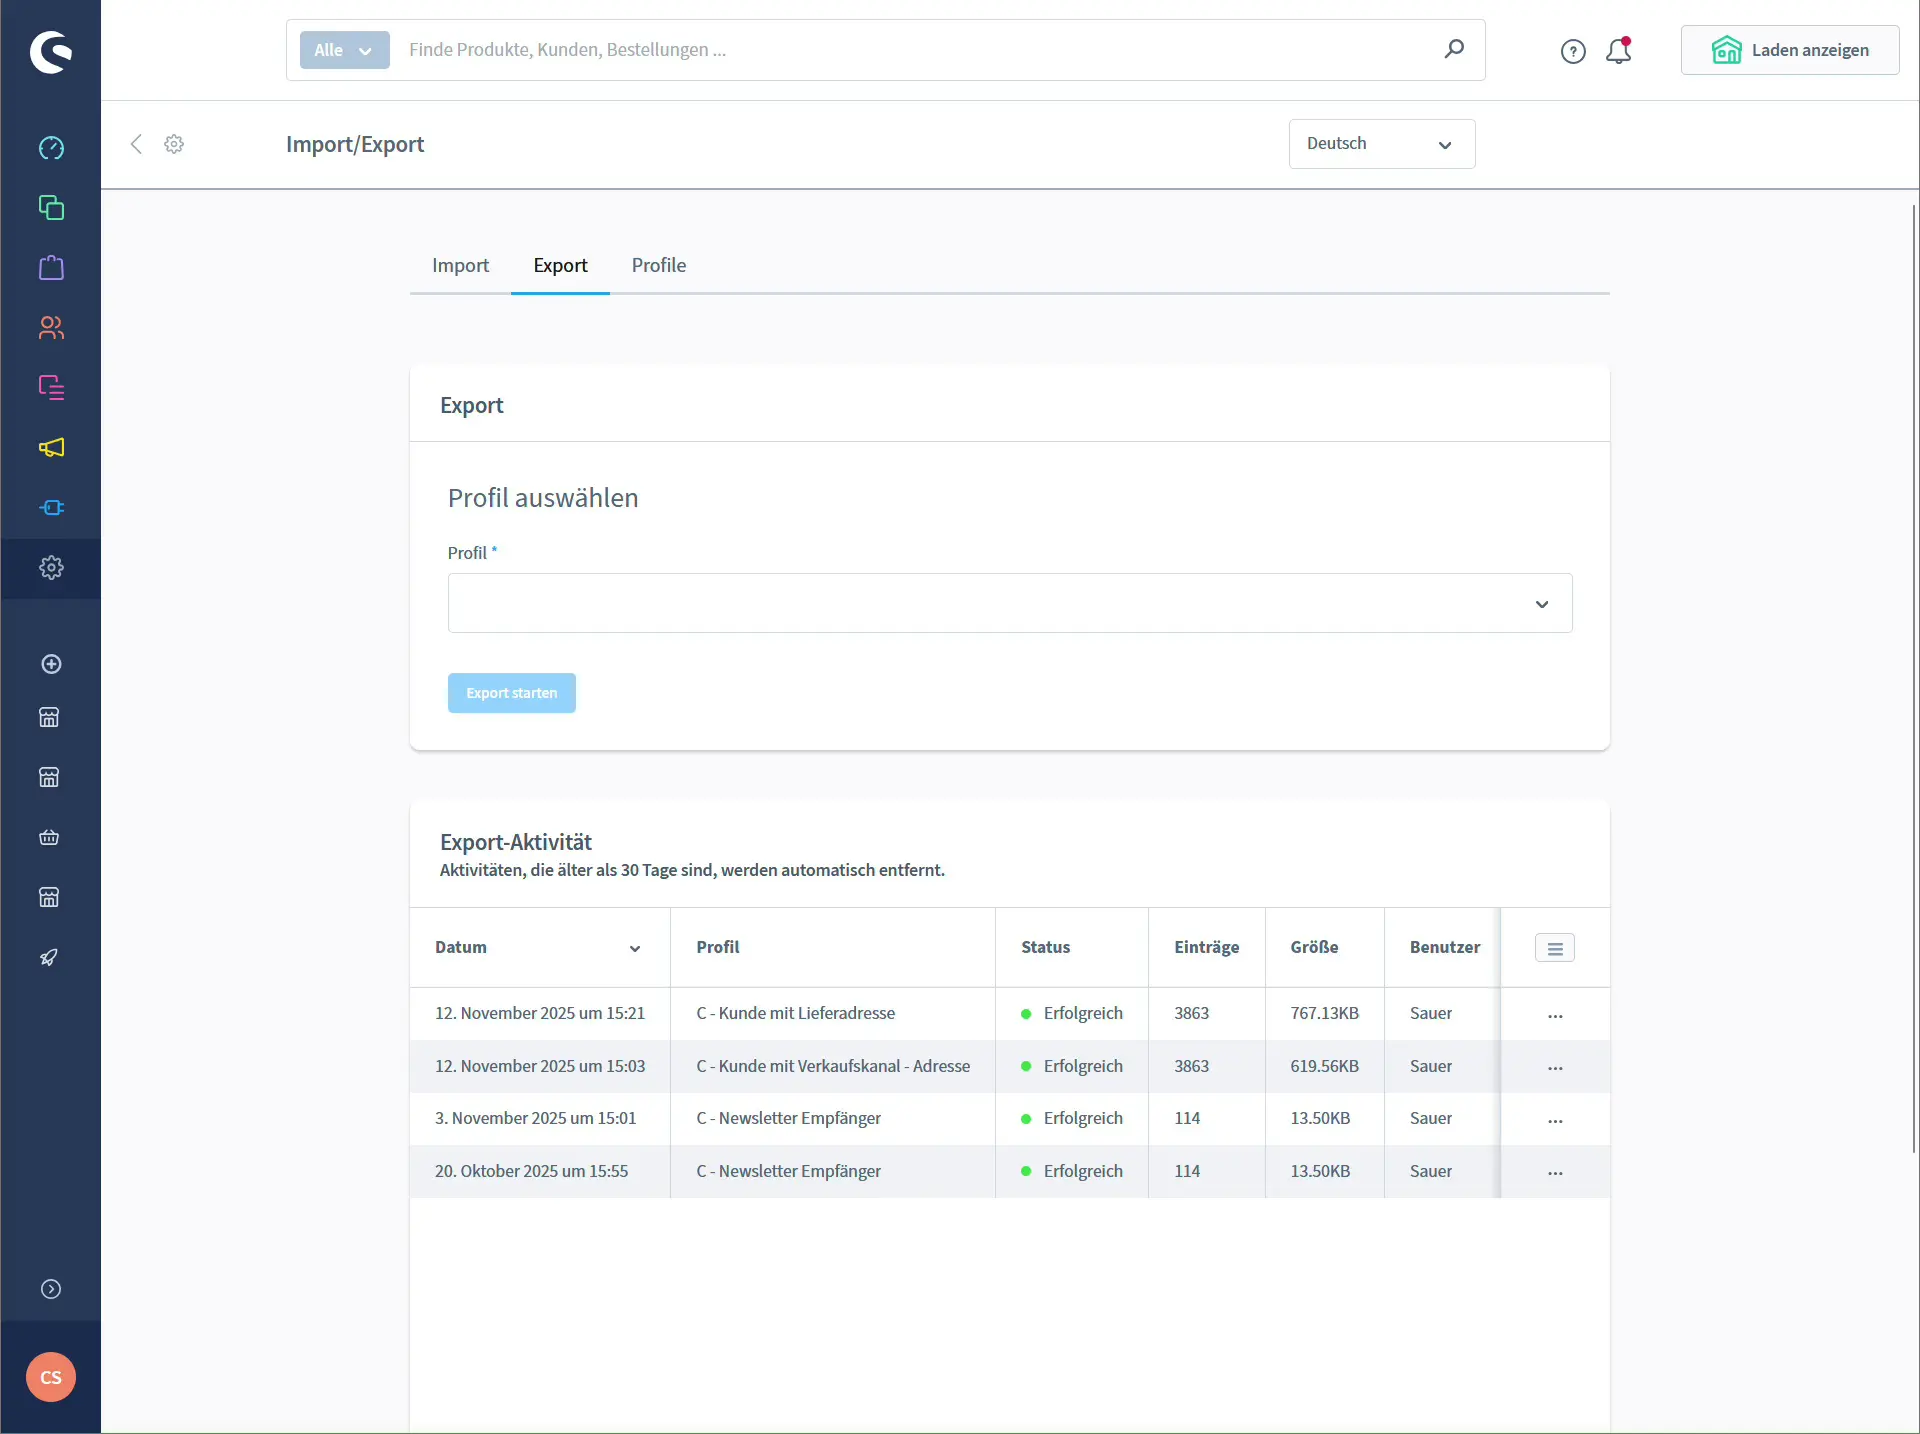
4. Run the CSV export of newsletter recipients
Once the profile is in place, you can start the actual Shopware 6 newsletter export.
- Go back to Import/Export and open the Export tab.
- In the profile dropdown select your new profile.
- Click Start export.
Shopware now creates an export job. In the “Export activity” section you will shortly see a new entry with status “Successful”. Use the action menu on the right to download the finished CSV file.
You now have the full newsletter recipient list from your Shopware 6 store on your computer.
What to do with the exported newsletter list
The CSV file is flexible and can be used in different ways. Here are two common scenarios.
CSV import into an email marketing tool
- Open your email marketing tool, for example Mailchimp, Brevo, CleverReach or Sendinblue.
- Create a new list, audience or segment.
- Import the CSV file and map the columns to the fields in your tool: email, status, first name, last name, language, sales channel.
- Filter by status
optInduring import so that only confirmed subscribers are imported.
This way your email marketing tool always has the current newsletter recipients from your Shopware 6 store.
Use the CSV file in Thunderbird or Outlook
If you have smaller lists or send newsletters only occasionally, you can also use the CSV file directly in Thunderbird or Outlook.
- Open the CSV file in Excel or LibreOffice.
- Copy the column with the email addresses.
- Paste the addresses into the BCC field of your email client so recipients cannot see each other.
Keep in mind that many providers limit how many recipients you can send to in a single email. For larger lists a dedicated newsletter tool is usually the better solution.
Extensions: send newsletters directly from Shopware 6
If you do not want to rely on an external email marketing tool, you can look for plugins in the Shopware Store that handle newsletter sending directly inside Shopware 6. Most of these extensions use the existing newsletter recipients, integrate with the rule builder for segmentation and come with their own templates and statistics.
The basic principle stays the same: Shopware 6 collects the newsletter subscribers and forwards them in a structured way to a system that is optimized for email marketing.
Legal notes and best practices
This article is not legal advice, but there are a few points you should keep in mind:
- Use the Shopware 6 double opt in feature for your newsletter signups whenever possible.
- Make sure your newsletter contains links to your imprint and privacy policy.
- Every newsletter should have a clearly visible unsubscribe link.
- When you work with an external provider, sign a data processing agreement and check where the data is stored.
- Remove subscribers who requested deletion not only from Shopware 6 but also from your external email marketing tools.
Handled correctly, a Shopware 6 newsletter export gives you full control over your subscriber data and lets you combine the strengths of Shopware 6 with powerful email marketing tools.