- Quick explainer – what is Ultimaker Cura
- What is Creality Print
- What is the Creality K1 Max
- Step by step – add a thumbnail in Ultimaker Cura to the G-code file
- How the entry looks in G-code
- Practical tips for reliable thumbnails
- Common errors and fixes
- Why two sizes – 96×96 and 300×300
- Compatibility and alternatives
- Compatibility
- Alternatives to Cura
- OctoPrint
- FAQ
- Glossary
A small preview image saves time when you pick a file on the 3D printer. The Creality K1 Max (*) shows G-code thumbnails right on the touchscreen and inside Creality Print. Cura does not create these images by default, but a built-in script solves it neatly. In this guide I walk you through, step by step, how to add a thumbnail to G-code in Ultimaker Cura. I tested the process with a Creality K1 Max and it also works on many other printers that understand PNG thumbnails embedded in G-code.
For context: I use Windows 11. I have been running a Creality K1 Max since October 2025 and manage the printer over LAN and WLAN. I slice in Ultimaker Cura and usually transfer jobs via Creality Print. I do not use Creality Print for slicing because I am used to Ultimaker Cura. The key requirement is that your slicer writes the thumbnail into the .gcode file on export.
Quick explainer – what is Ultimaker Cura
Ultimaker Cura is a free and widely used slicer. It converts 3D models into G-code and includes many printer profiles. A big advantage is the set of Post Processing scripts that automatically adjust the G-code after slicing – for example to generate thumbnails.
What is Creality Print
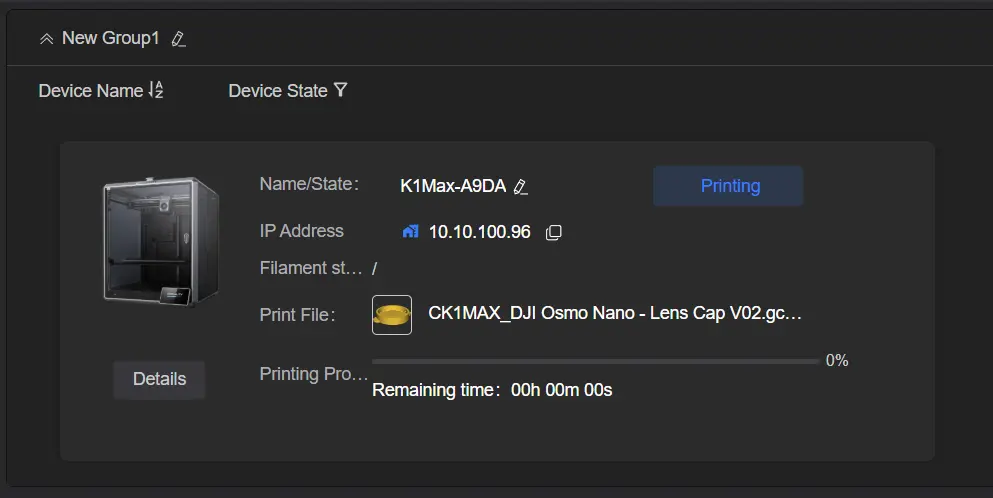
Creality Print is Creality’s desktop software for slicing, managing, and sending print jobs. You can use it to send G-code to K-series printers such as the K1 Max (*), monitor the printer, and slice models. In this article I only use Creality Print to upload files. The thumbnails are created in Cura and are displayed correctly by both Creality Print and the printer.
What is the Creality K1 Max
The Creality K1 Max (*) is a fast Core XY printer with a 300 x 300 mm build area. It uses a Klipper-based system, a web interface, and app integration. It shows preview images directly in the file list on its built-in touchscreen when the G-code contains them. The K1 Max reads PNG thumbnails that are embedded in the G-code as Base64 data inside comment lines.
Step by step – add a thumbnail in Ultimaker Cura to the G-code file
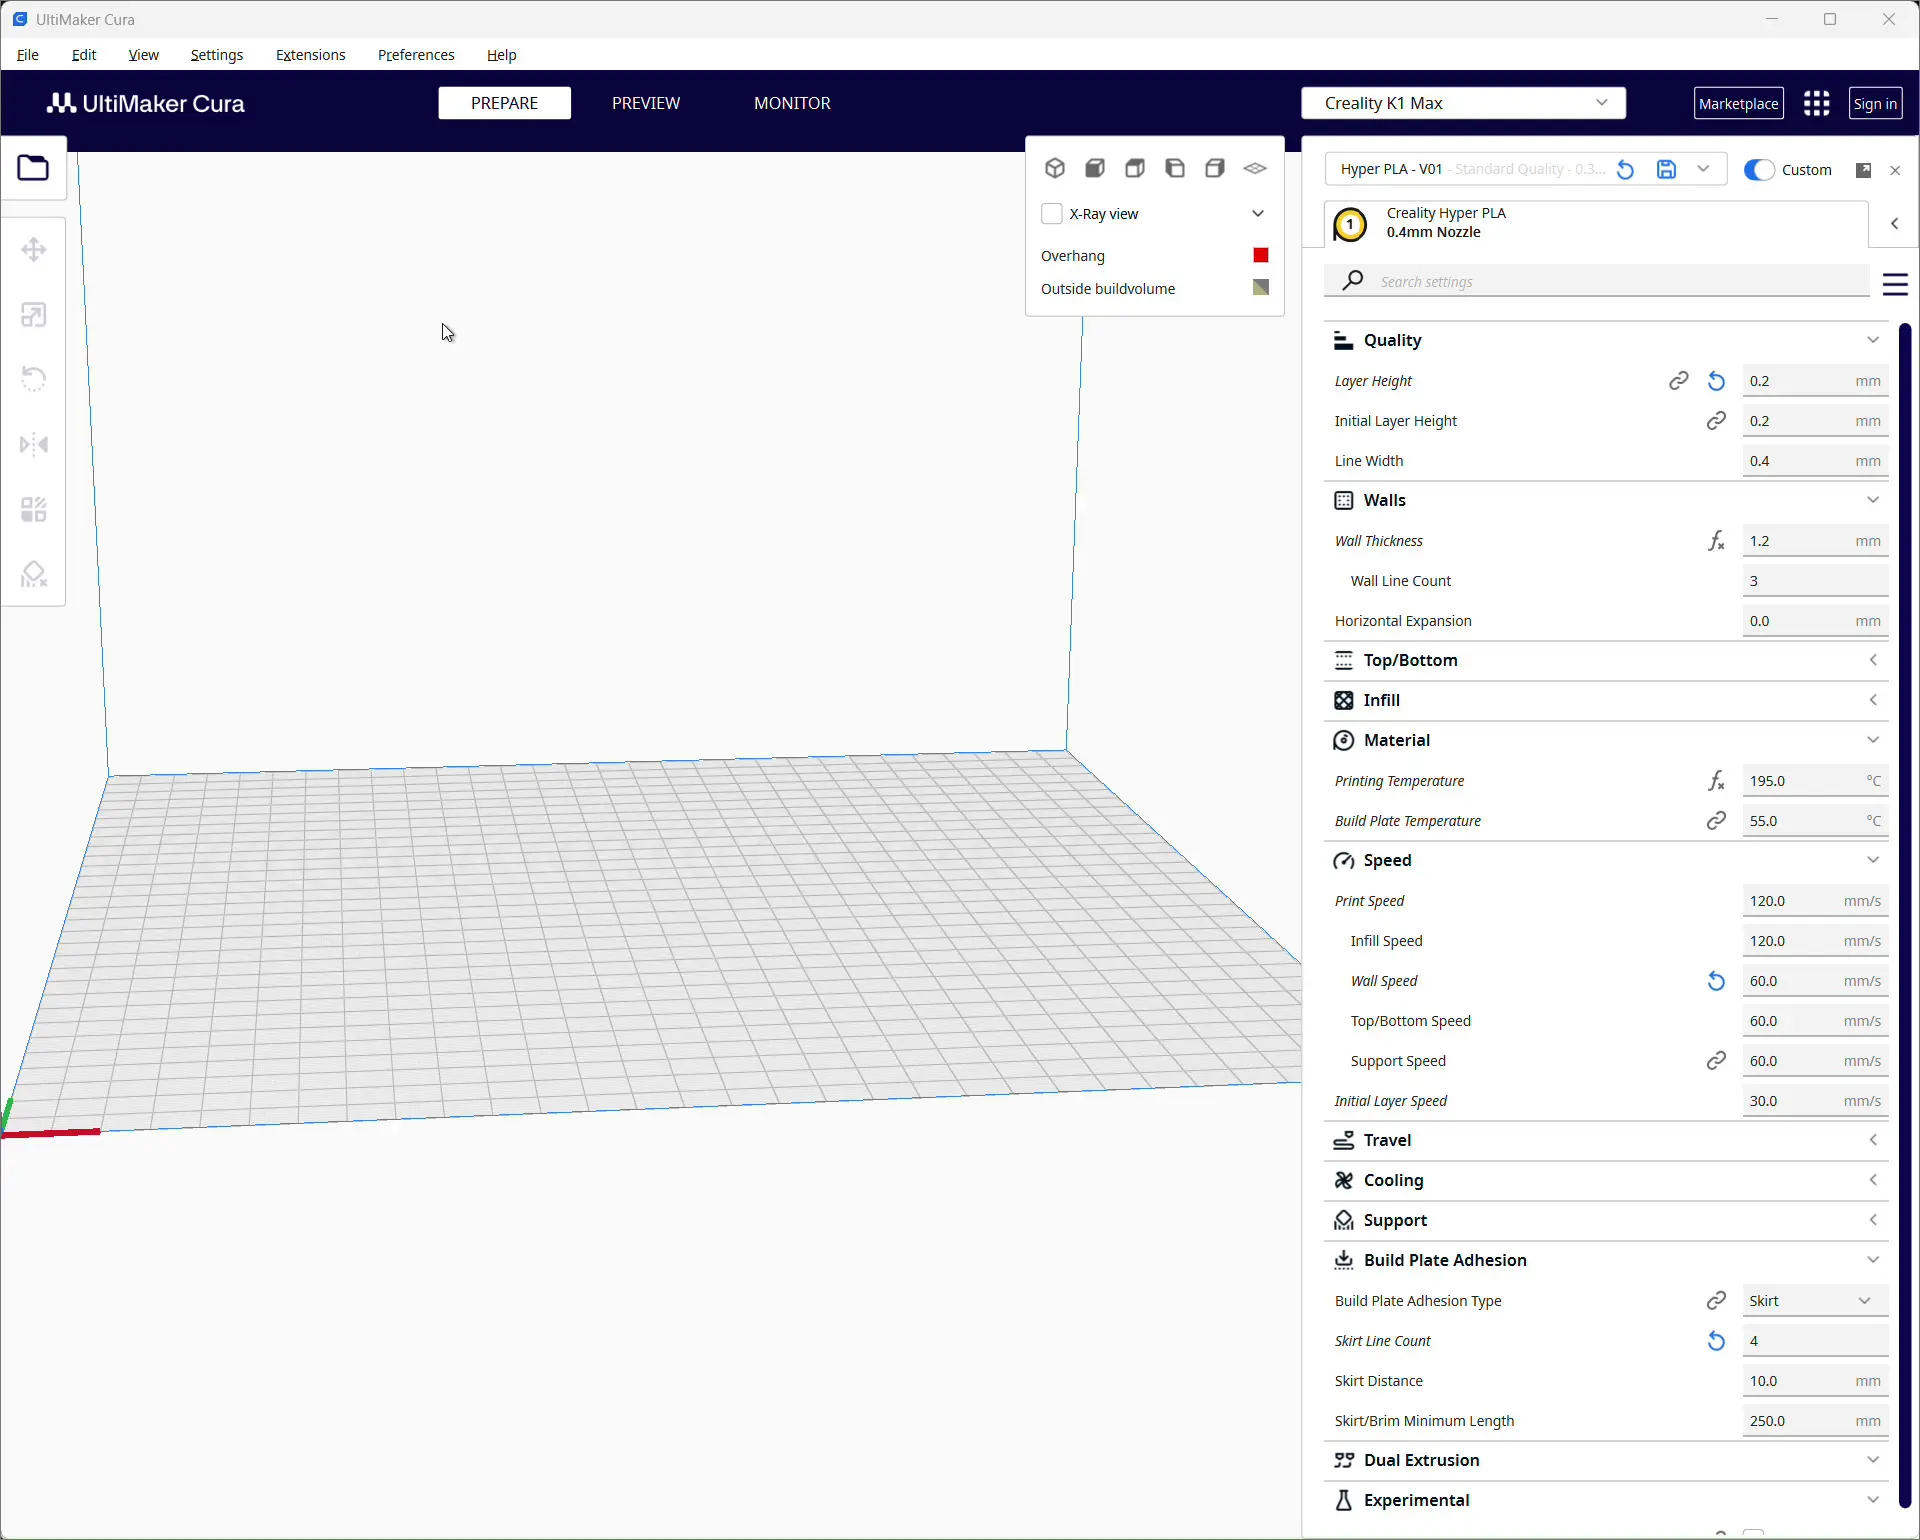


- Load your model and choose settings
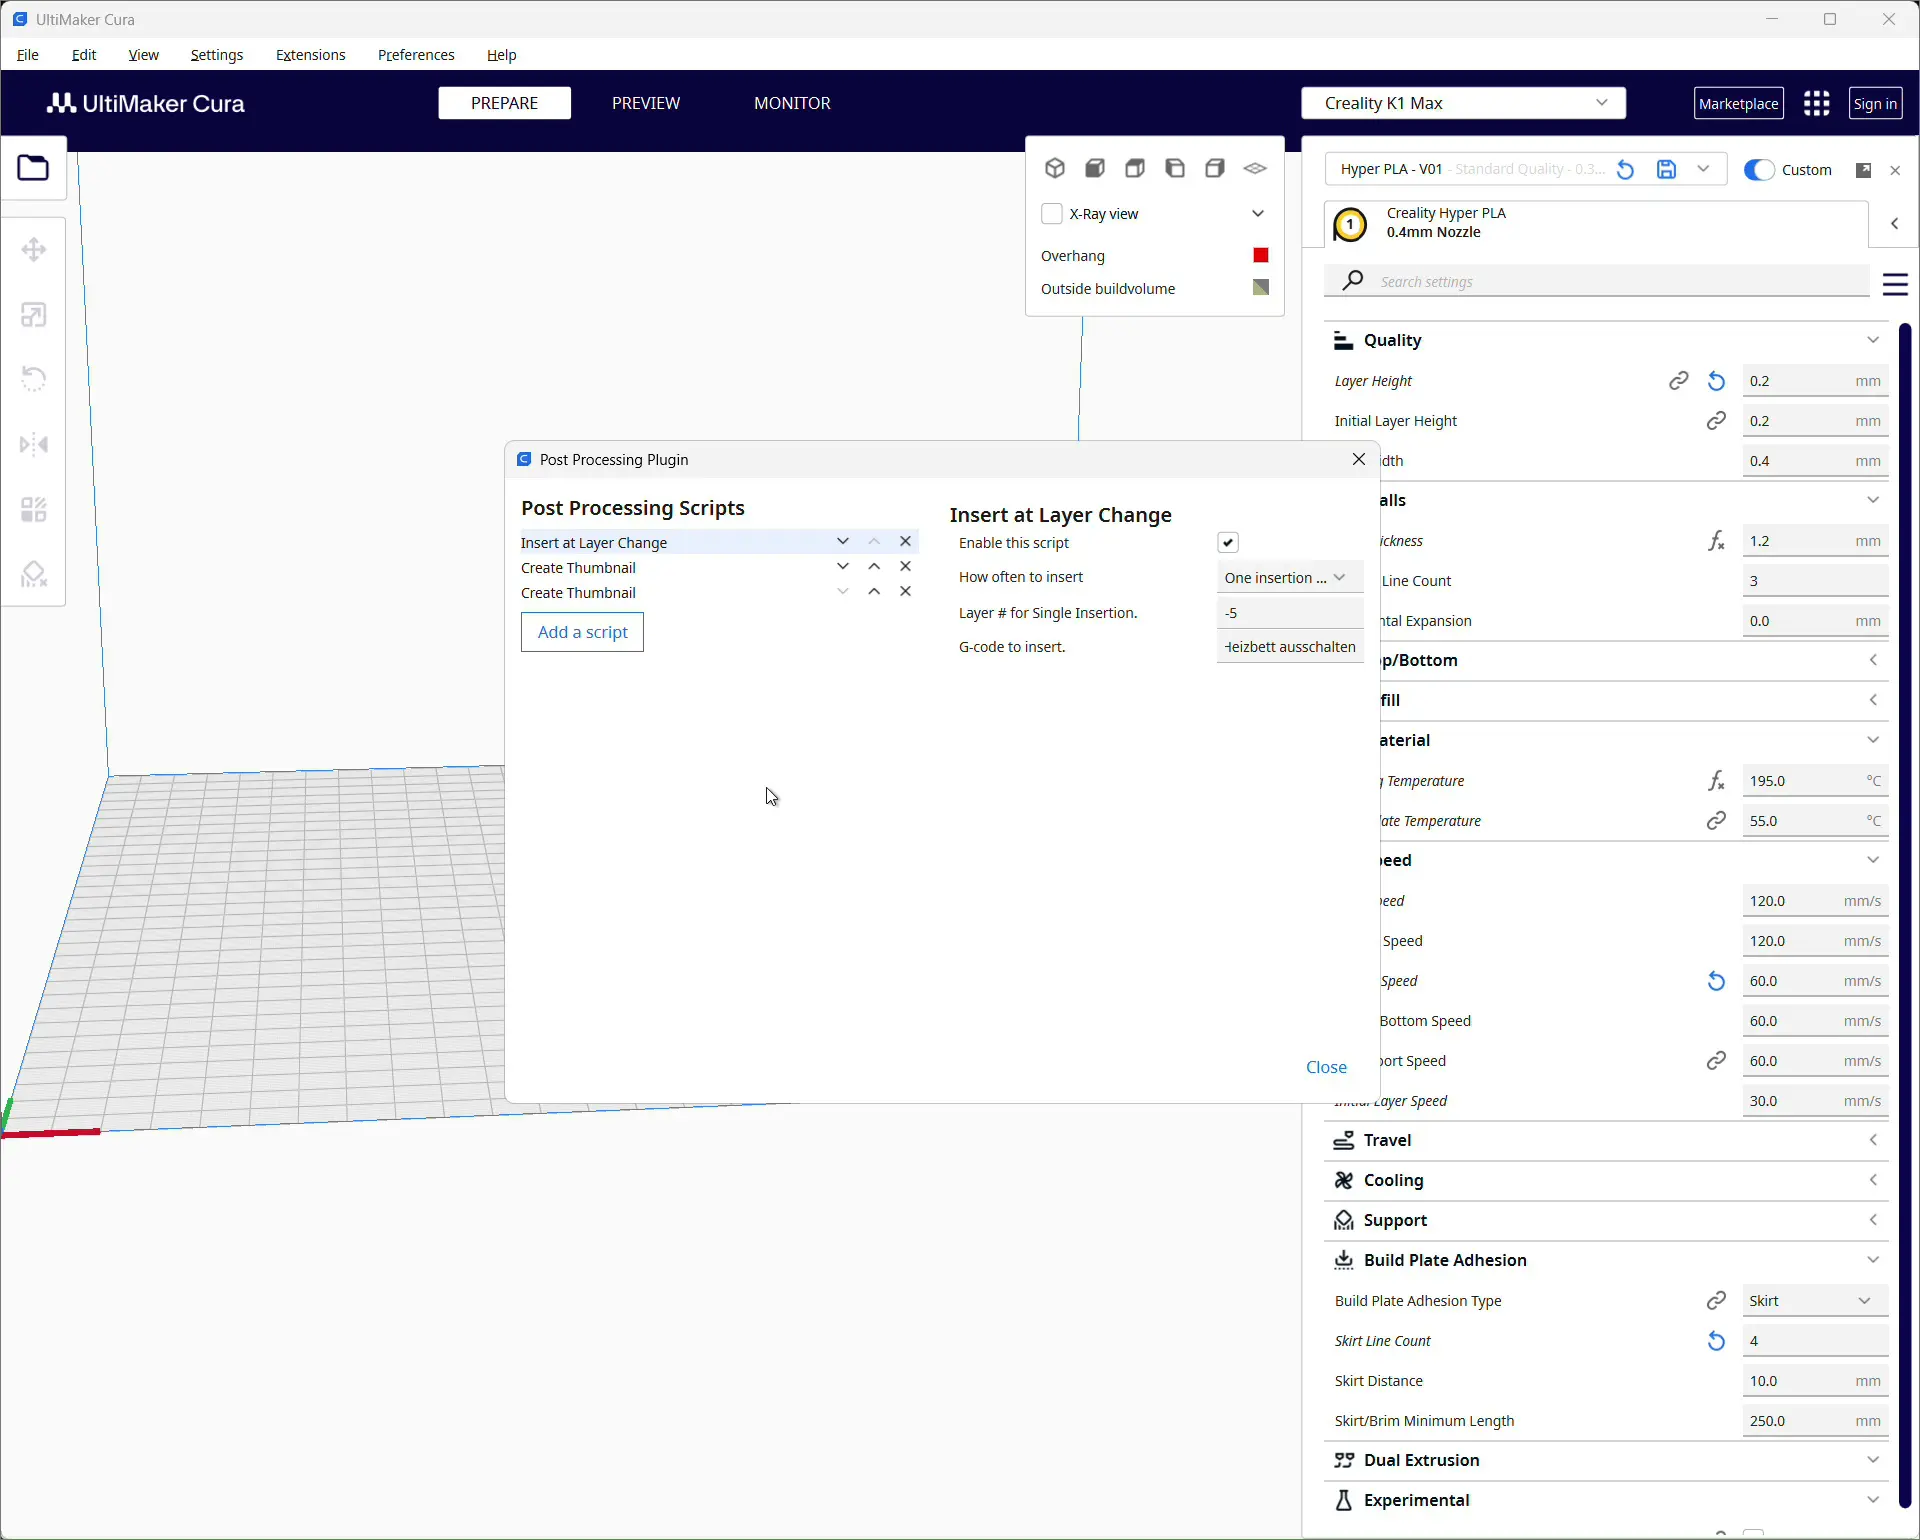
Open your model in Cura and set the printer profile, material, and quality. - Open Post Processing
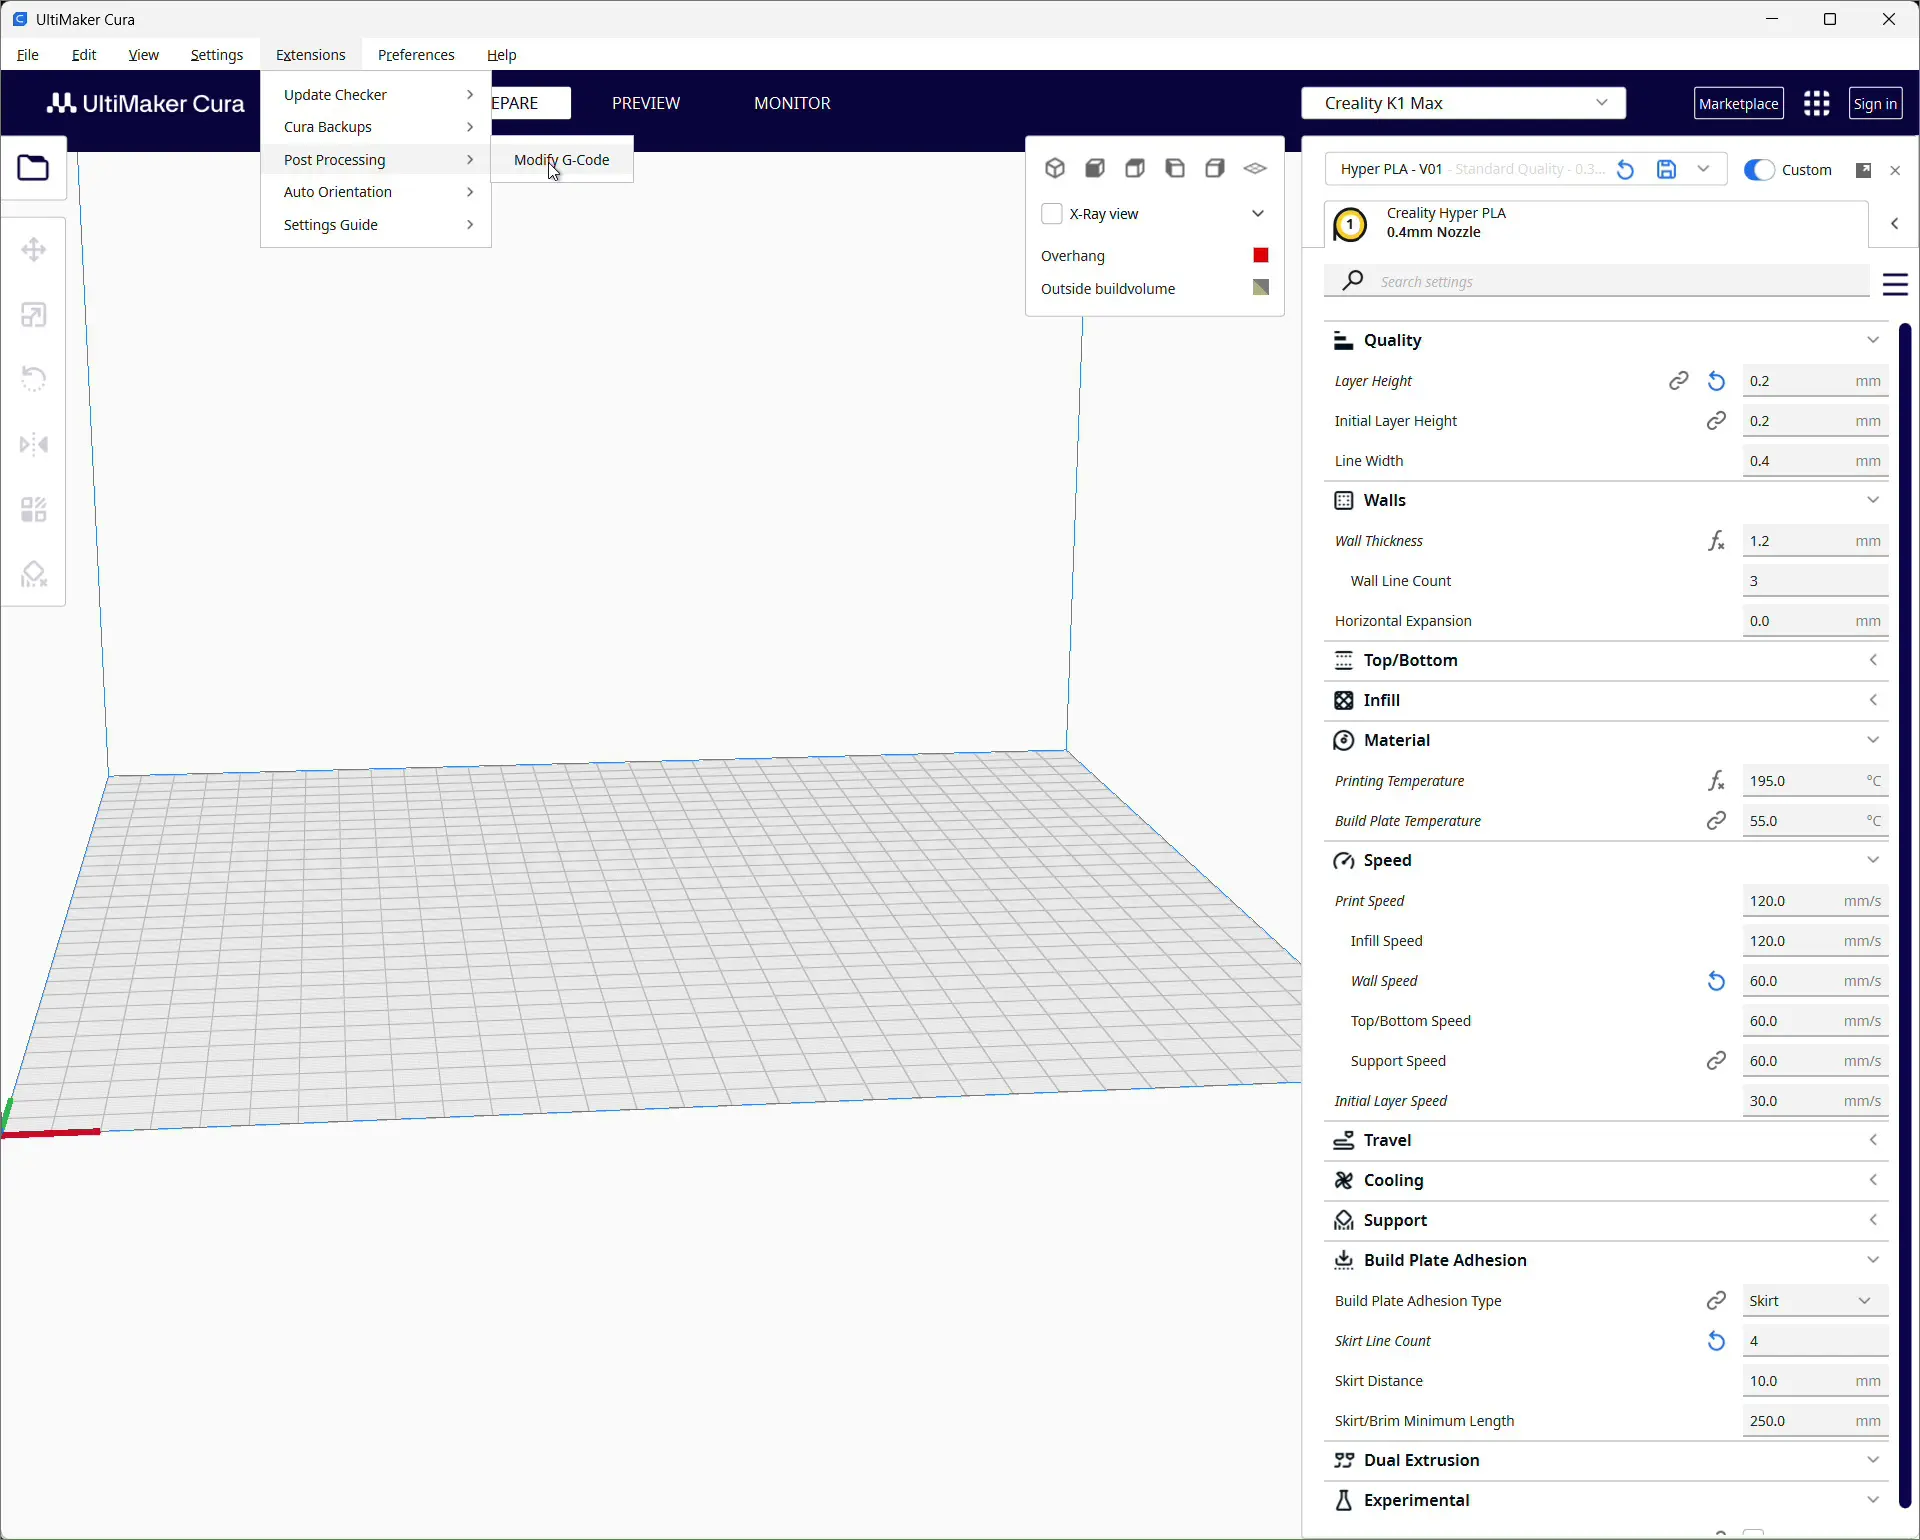
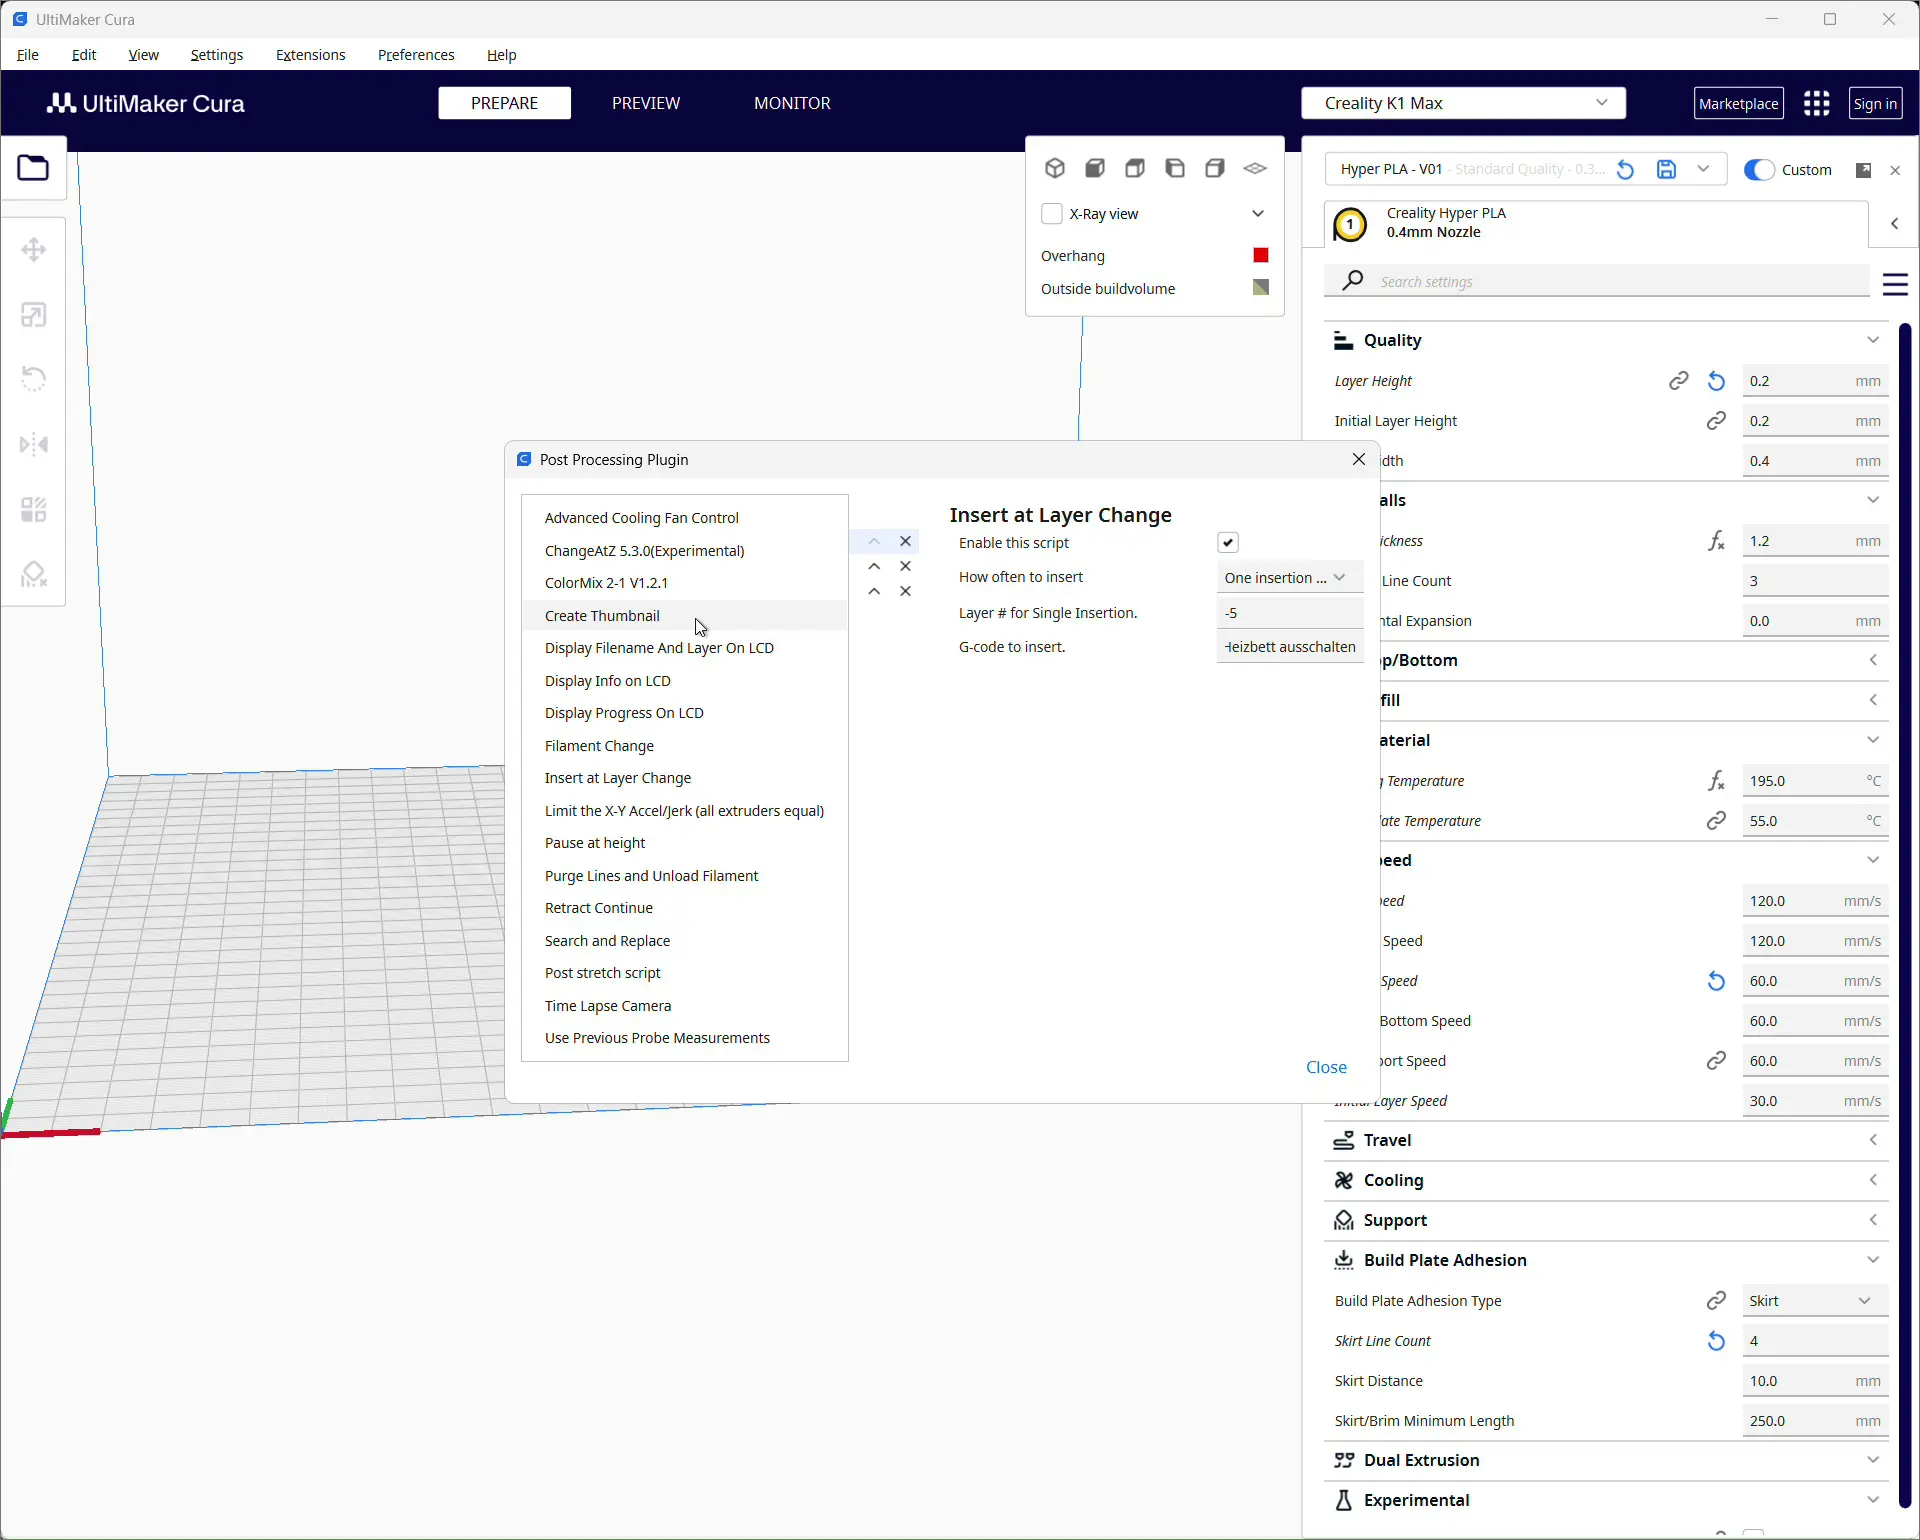
Go to Extensions – Post Processing – Modify G-code. - Add the script
Click Add a script and choose Create Thumbnail. - Add a second thumbnail
Add Create Thumbnail a second time. The K1 Max shows two sizes very cleanly:
96 x 96 pixels
300 x 300 pixels - Save and slice
Close the dialog, slice the model, and save the G-code. Cura now writes the thumbnail blocks at the end of the file. - Transfer to the printer
Upload the file with Creality Print, via the web interface, or by USB. In the file list on the Creality K1 Max and in Creality Print you will now see the preview image.
How the entry looks in G-code
At the end of the G-code you will find comments like these:
; thumbnail begin 300x300 12345
; iVBORw0KGgoAAA...
; ...many more Base64 lines...
; thumbnail end
; thumbnail begin 96x96 2345
; iVBORw0KGgoAAA...
; thumbnail end
The data itself is a Base64 encoded PNG image. Cura does all of this automatically. You do not have to add anything by hand.
Practical tips for reliable thumbnails
- Order of scripts
Keep both Create Thumbnail entries at the bottom of the Post Processing list so the image data really appears at the end of the file. - Watch file size
Thumbnails make the G-code a bit larger. That is normal and harmless. - Visual check
Open the file in a text editor and search forthumbnail begin. If the block is missing, the script was not active. - Not every interface shows thumbnails
The K1 Max and Creality Print do. OctoPrint or other UIs might need a plugin that can read G-code thumbnails. - Other printers
Some displays prefer different dimensions, for example 200 x 200. For Creality K series, 96 x 96 and 300 x 300 have proven reliable.
Common errors and fixes
- Preview is not shown on the K1 Max
Make sure you enabled two Create Thumbnail scripts in Cura and set the sizes correctly. Slice and save, do not rely on preview only. - Creality Print does not show an image
Reload the file, clear old caches in the app, or upload via LAN instead of USB. Ensure the file was sliced by Ultimaker Cura. - End of file is cut off
If an upload is interrupted the last lines can be missing, including the thumbnail. Upload the file again.
Why two sizes – 96×96 and 300×300
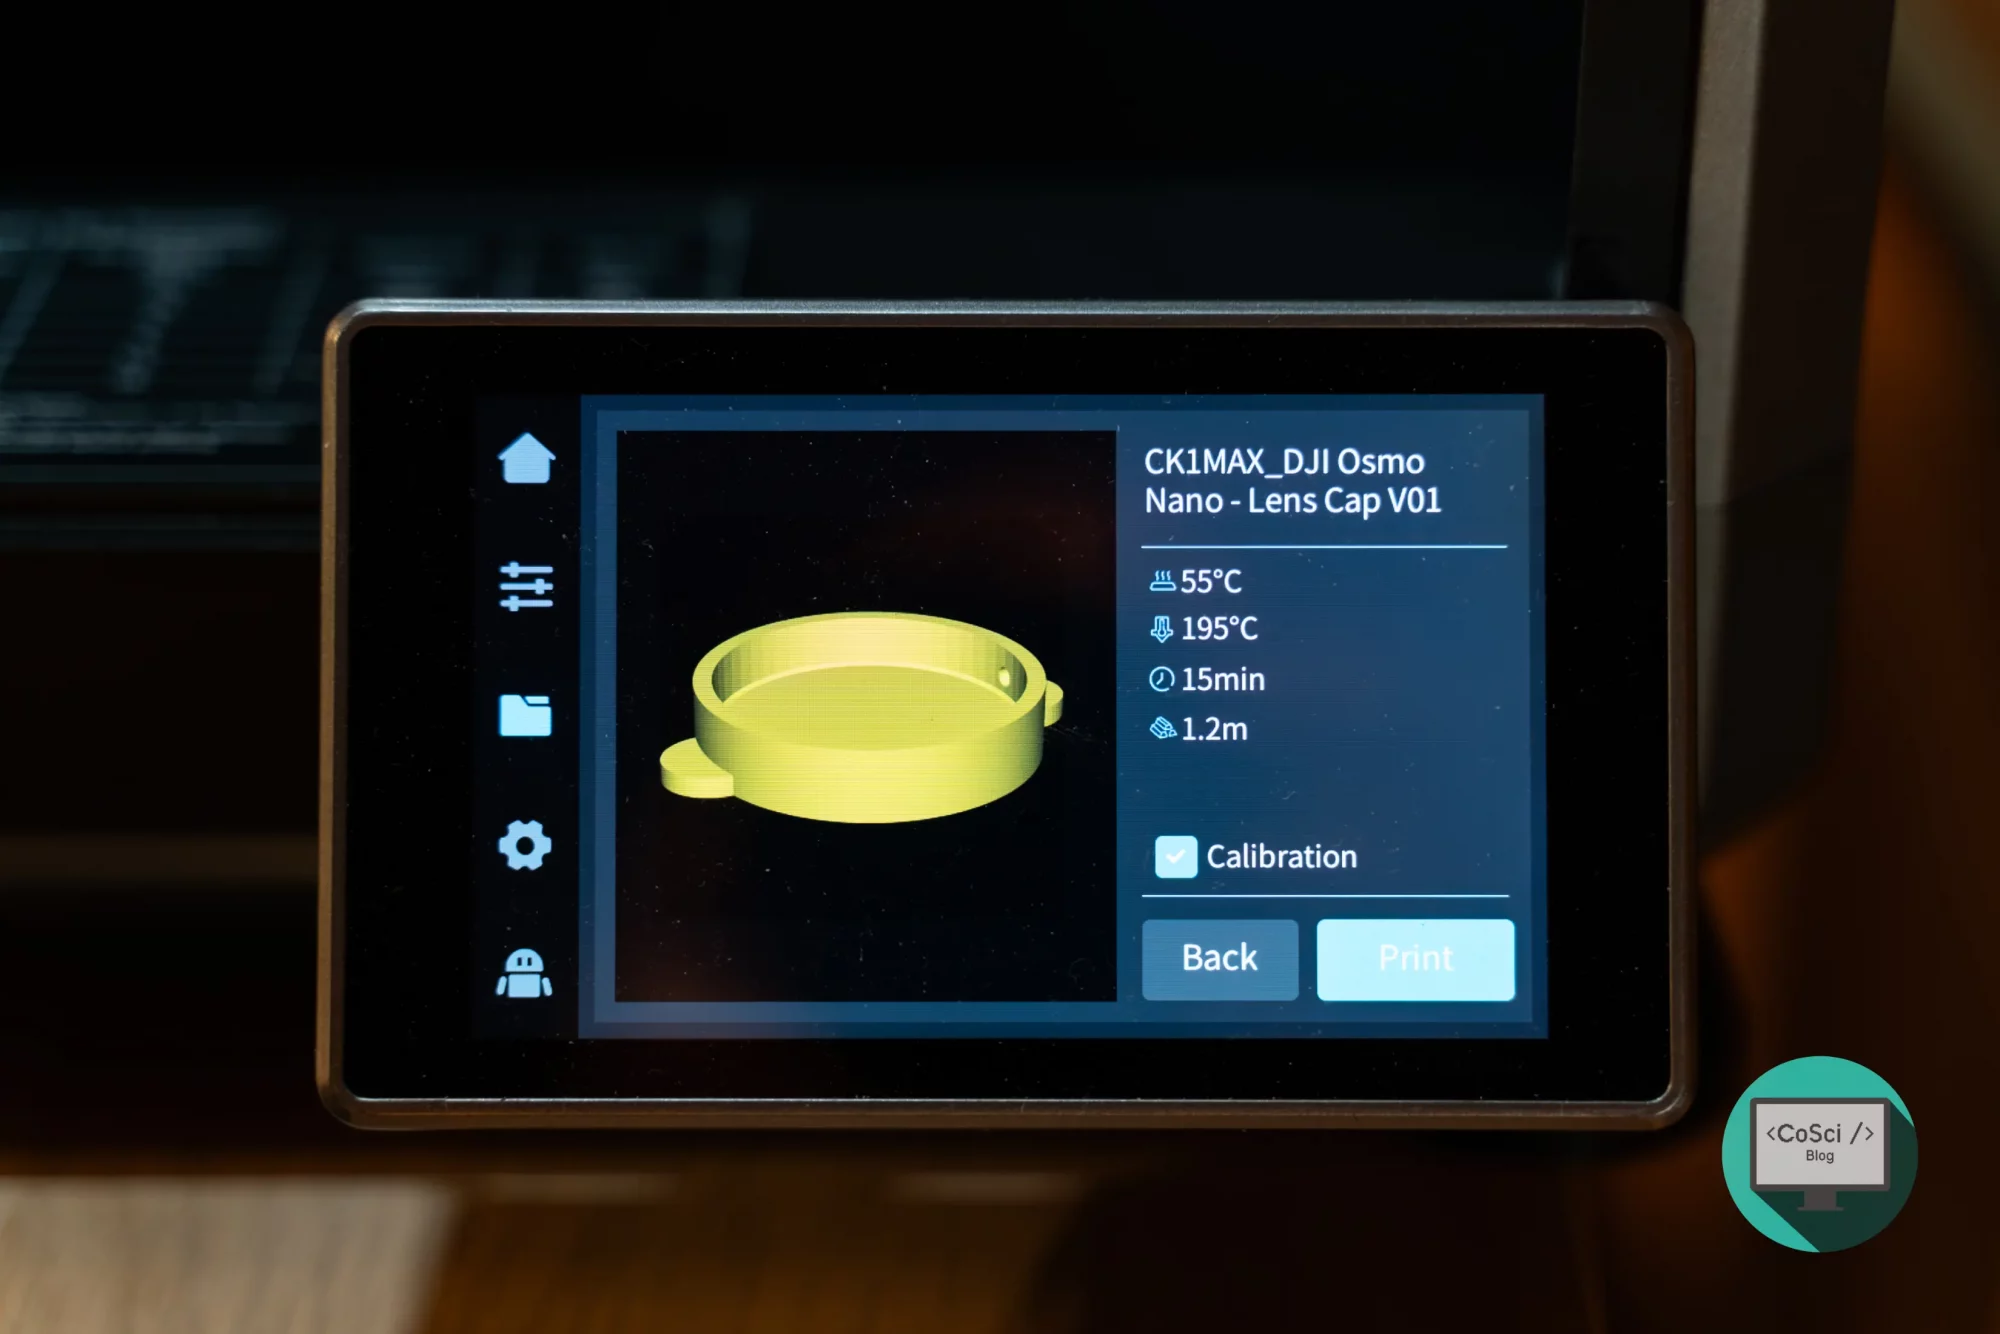
The K1 Max uses a small image for list views and a larger one for detail views. That is why we create two thumbnails. It keeps previews sharp and easy to read without making the file unnecessarily large.
Compatibility and alternatives
Compatibility
Anything that understands PNG thumbnails embedded in the G-code comments can use this method. That includes many modern printer displays and firmwares.
Alternatives to Cura
PrusaSlicer and OrcaSlicer offer similar options. This article focuses on Ultimaker Cura and the Creality K1 Max.
OctoPrint
If you use OctoPrint again, install a plugin such as G-code Thumbnails so the images show up in the browser too.
FAQ
Does the Creality K1 Max show thumbnails everywhere
Yes. They appear on the display during file selection and in Creality Print. The web interface can differ by version.
What sizes should I enter in Ultimaker Cura
For the K1 Max use 96 x 96 and 300 x 300 pixels. Add the Create Thumbnail script twice.
Can I add thumbnails to old G-code files
Technically yes, but it is tedious. It is usually faster to re-slice the model so Cura generates the images automatically.
Will the thumbnail increase print time
No. Thumbnails are only comment lines that the firmware ignores. They do not affect printing.
Does this also work when I slice in Creality Print
Many Creality profiles add previews when slicing in Creality Print. If you prefer Cura, the method above gives consistent results.
Glossary
G-code – Text files with movement and temperature commands for the 3D printer.
Slicer – Software that turns a 3D model into layers and G-code.
Post Processing – A step after slicing where G-code is automatically modified or extended.
Thumbnail – A small preview image shown in the file list.
Base64 – A text representation of binary data that is easy to embed in comments.
Creality Print – Creality’s management software for upload, control, and optional slicing.
Creality K1 Max – A fast Core XY printer with network features, a touchscreen display, and thumbnail support.
(*) Affiliate Links